Hi everyone, Sarah Summerton here with a new tutorial to suit this month's 'Midsummer's Moon' theme at Lavinia Stamps.
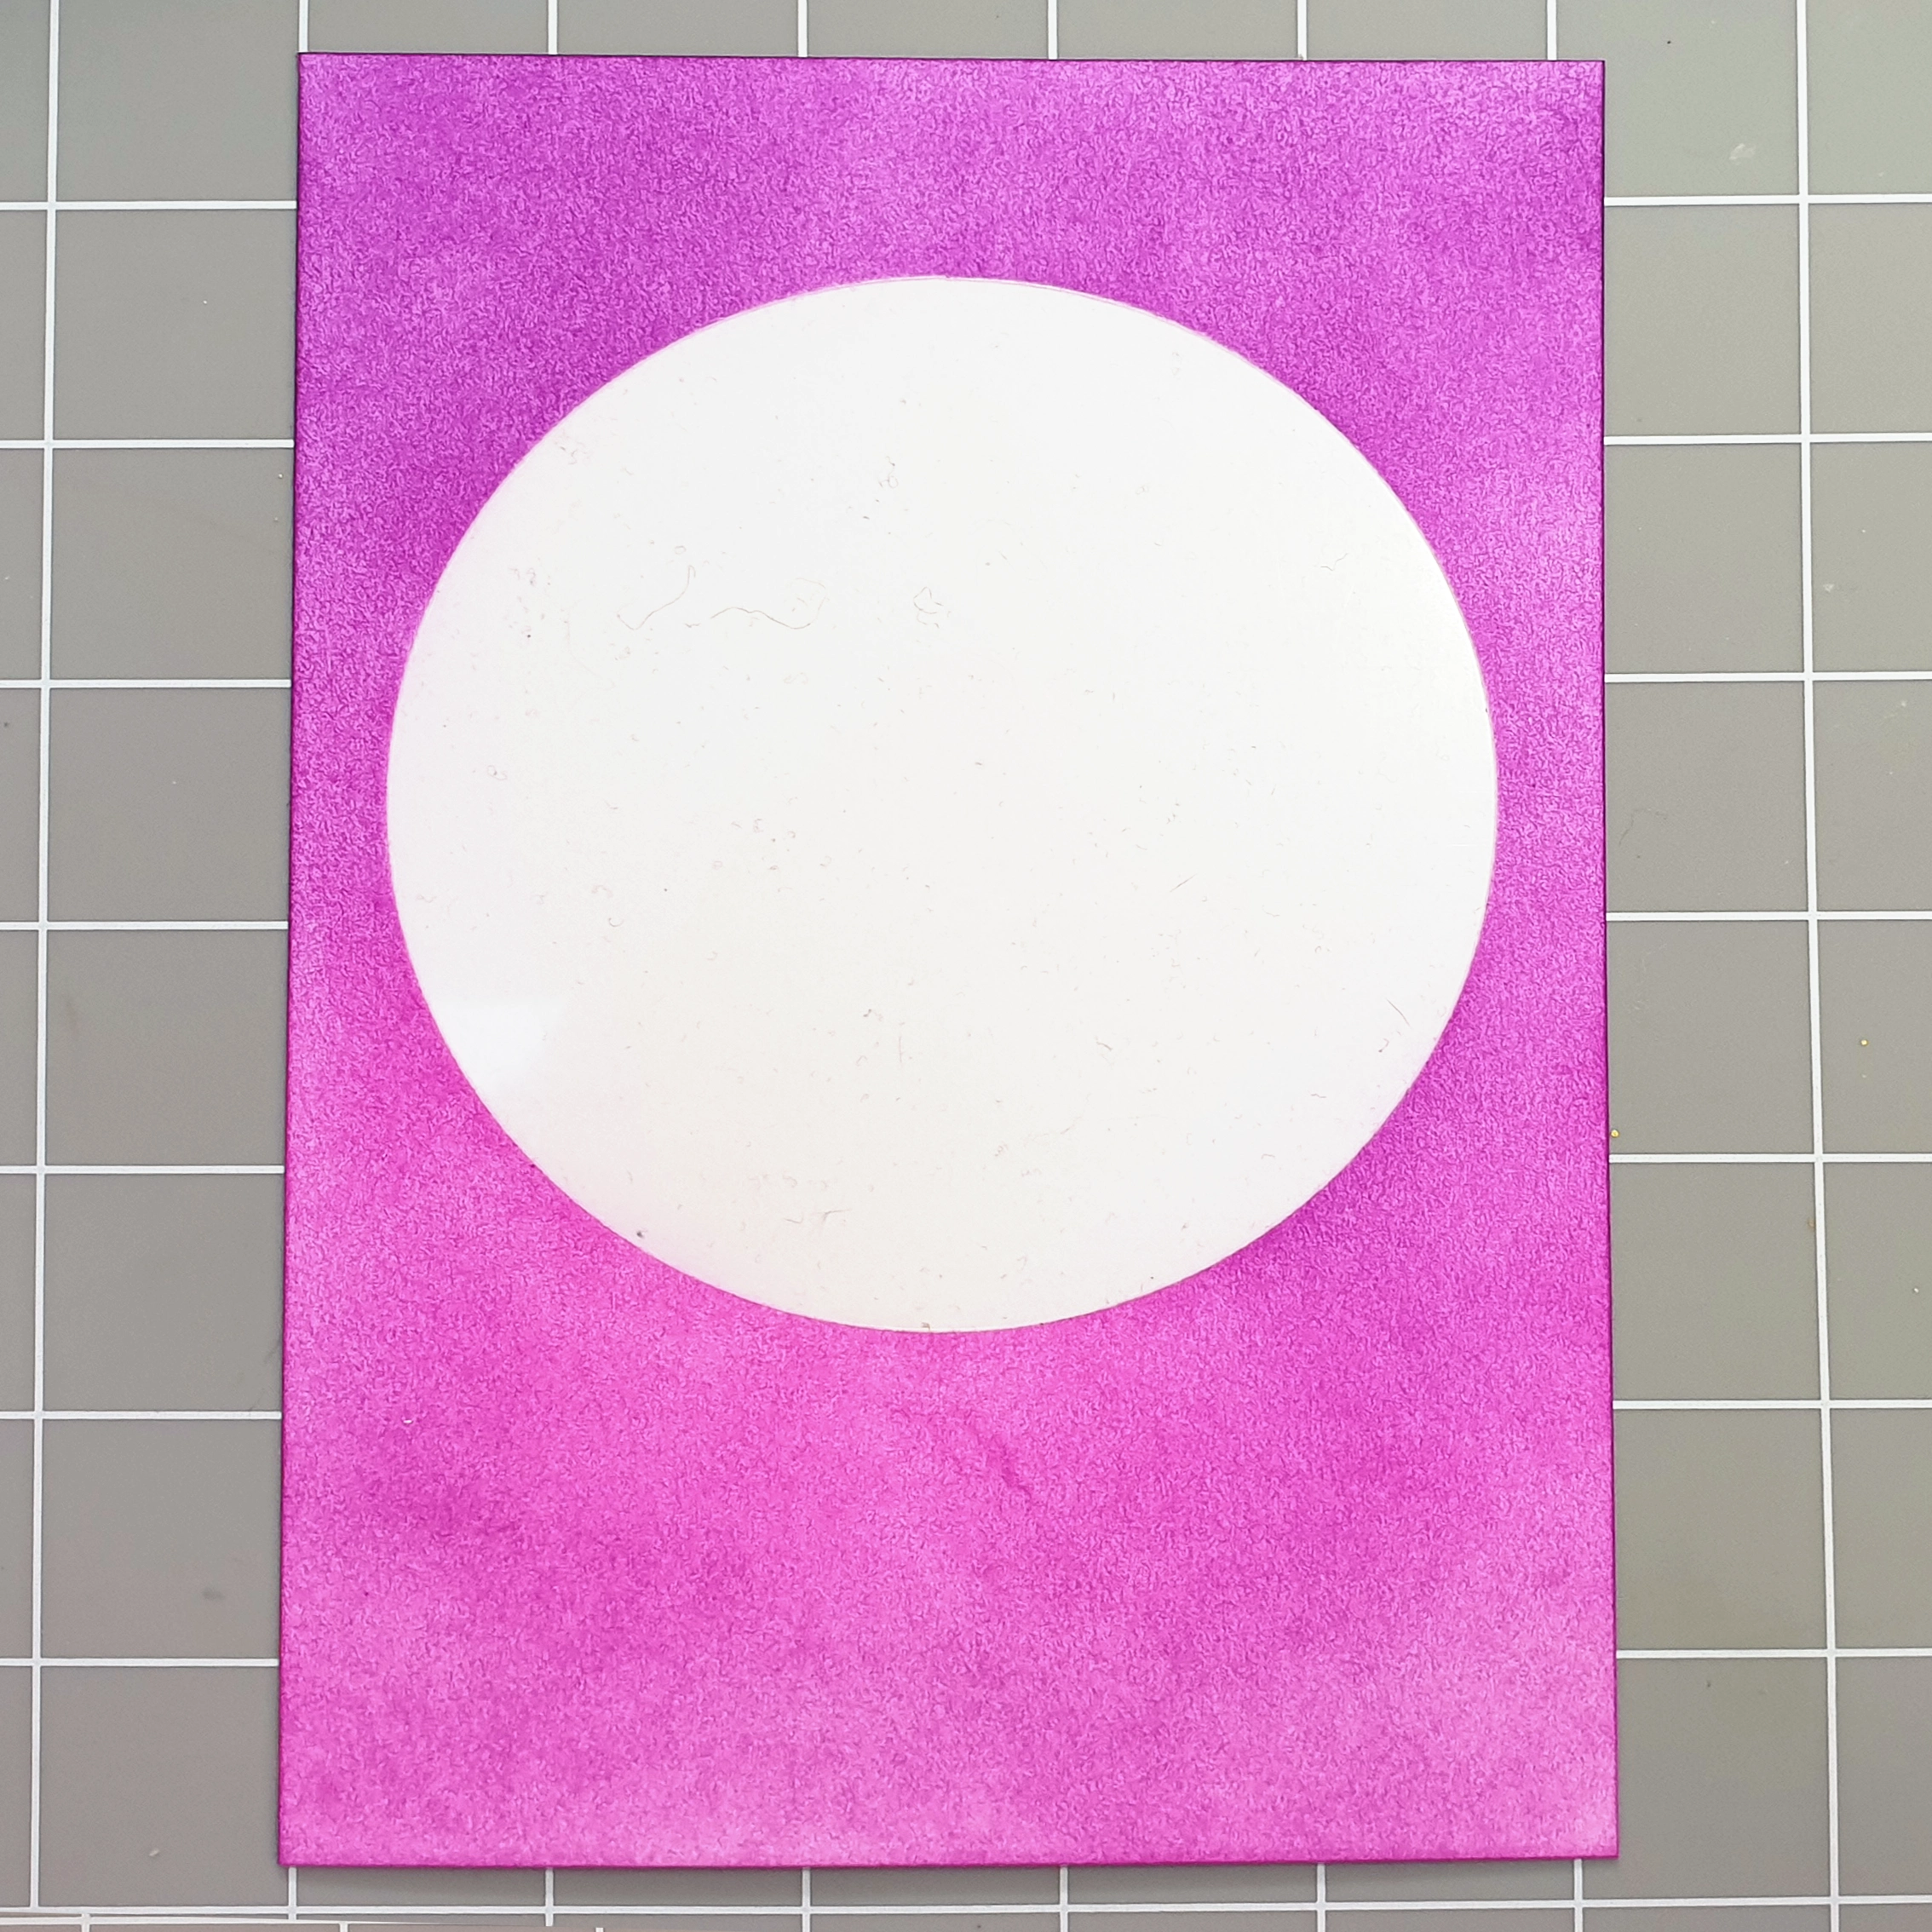
Step 1.
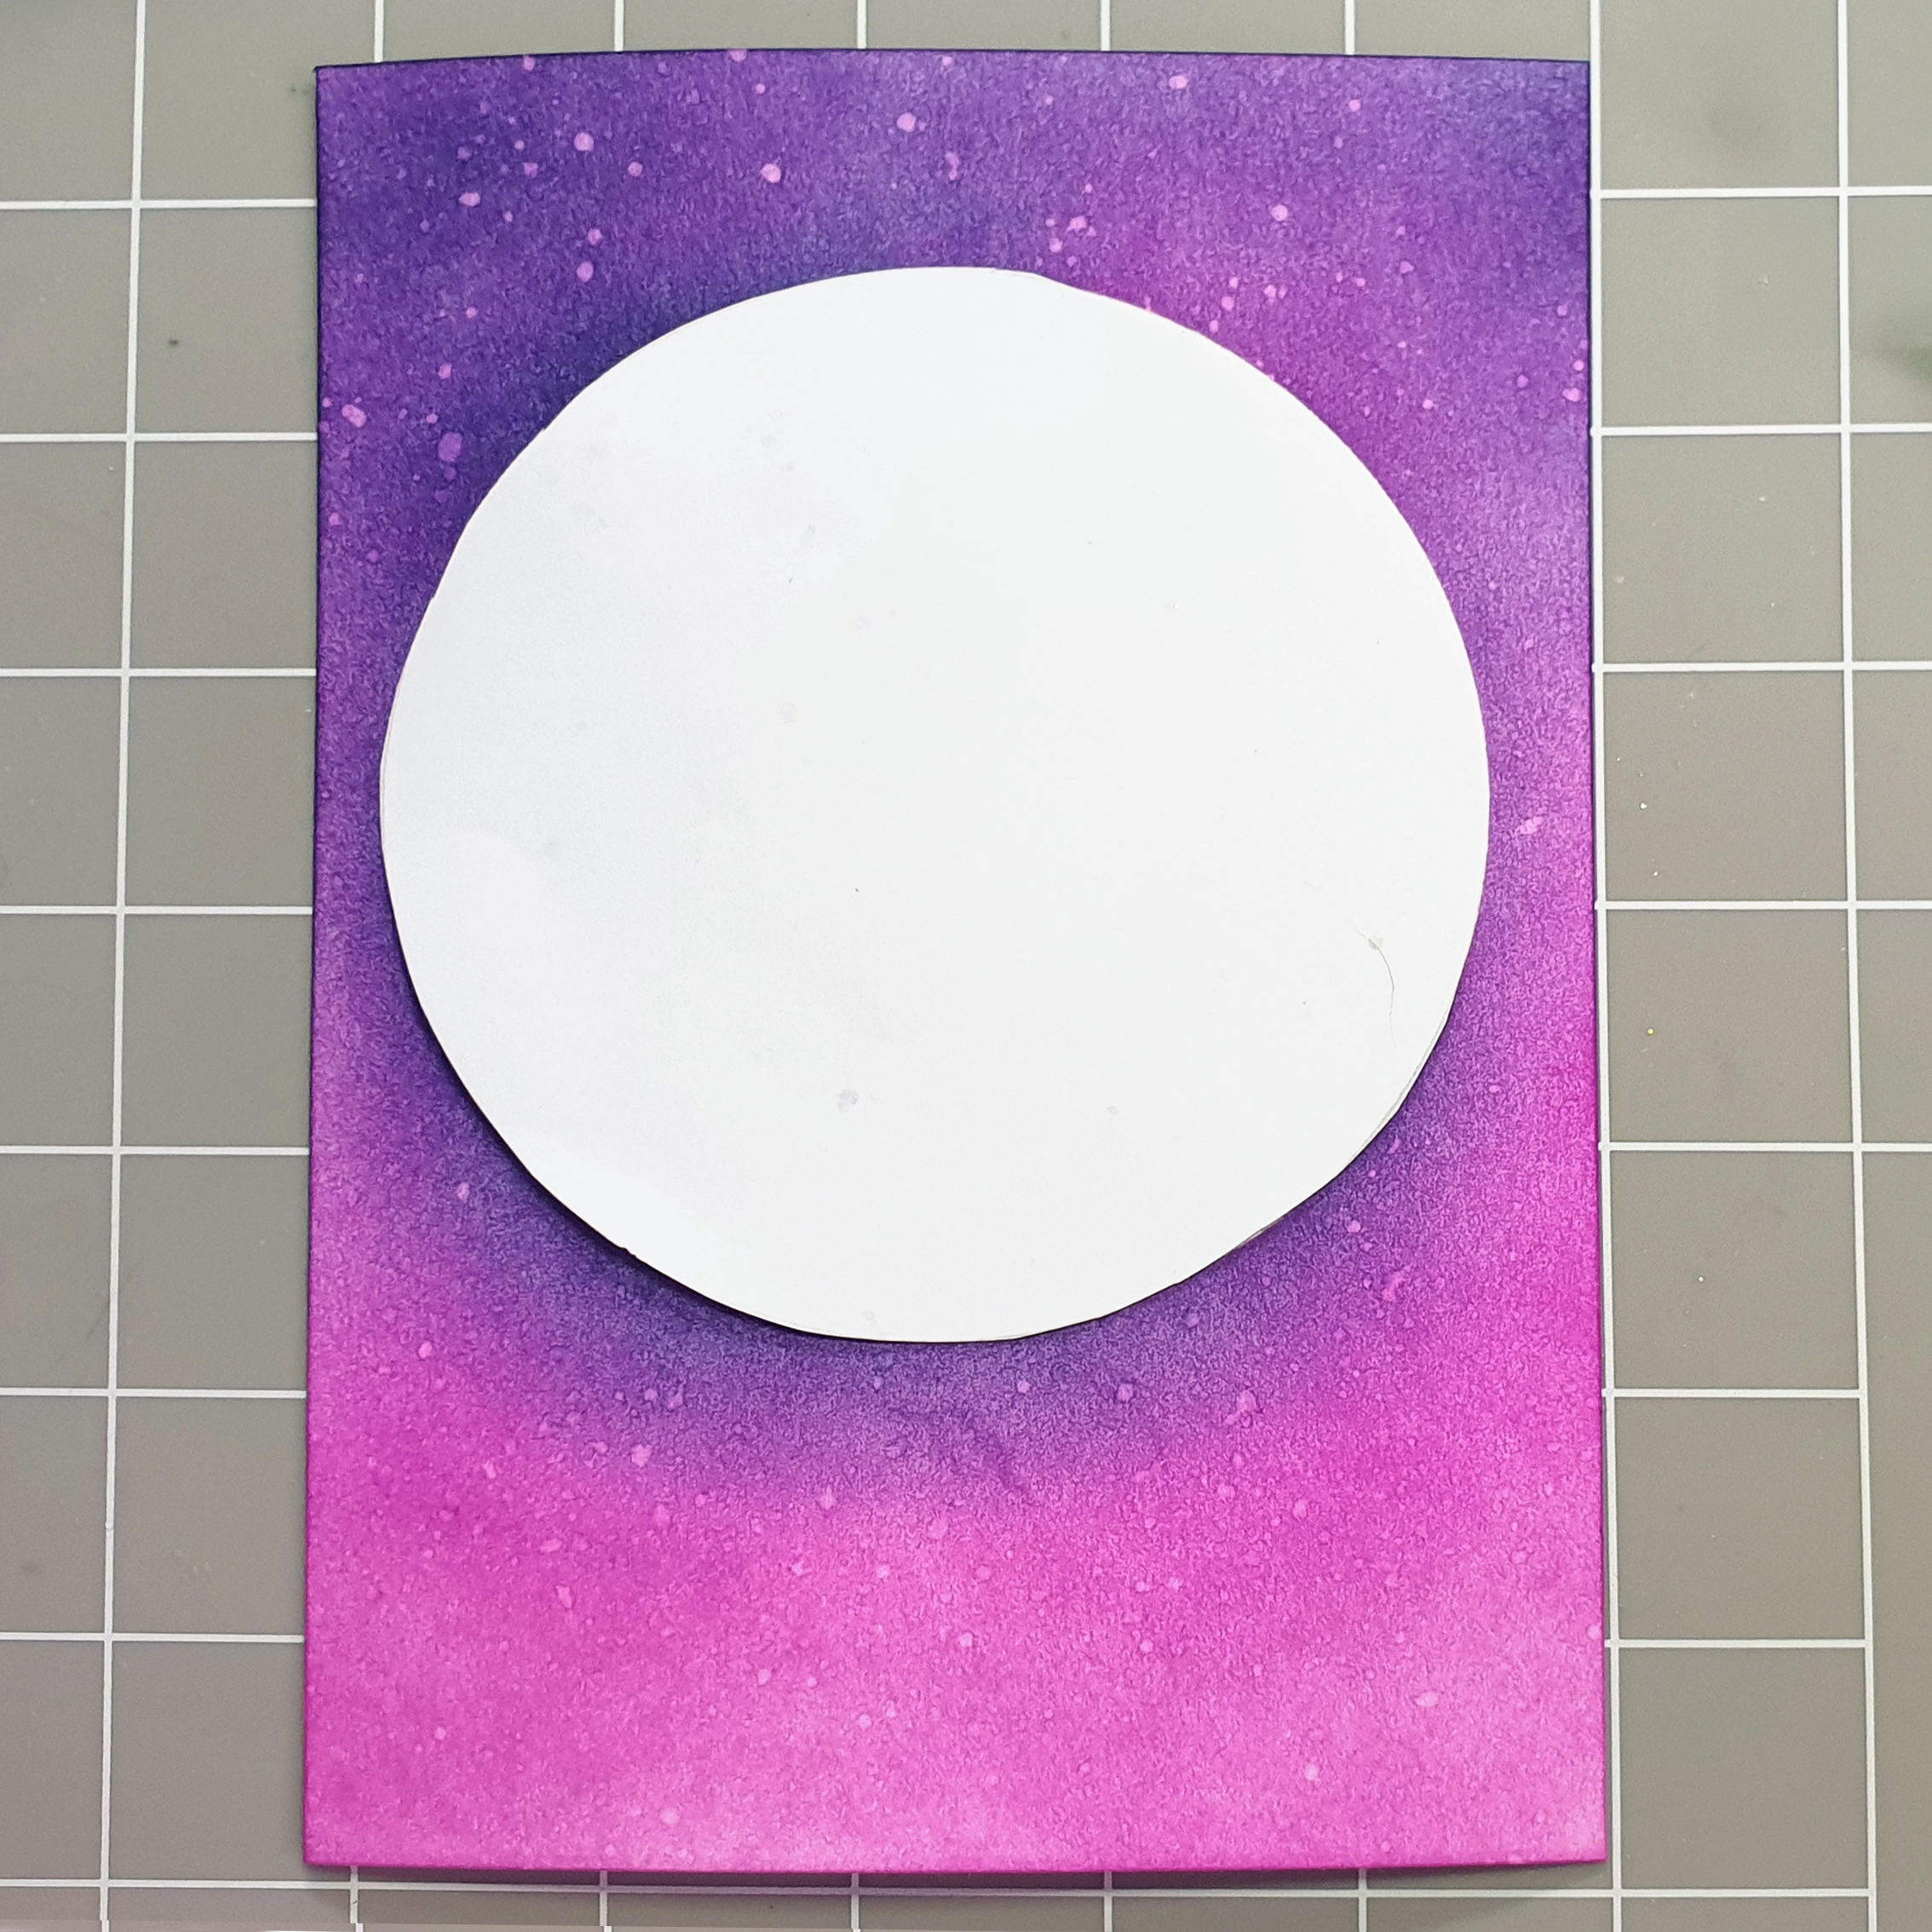
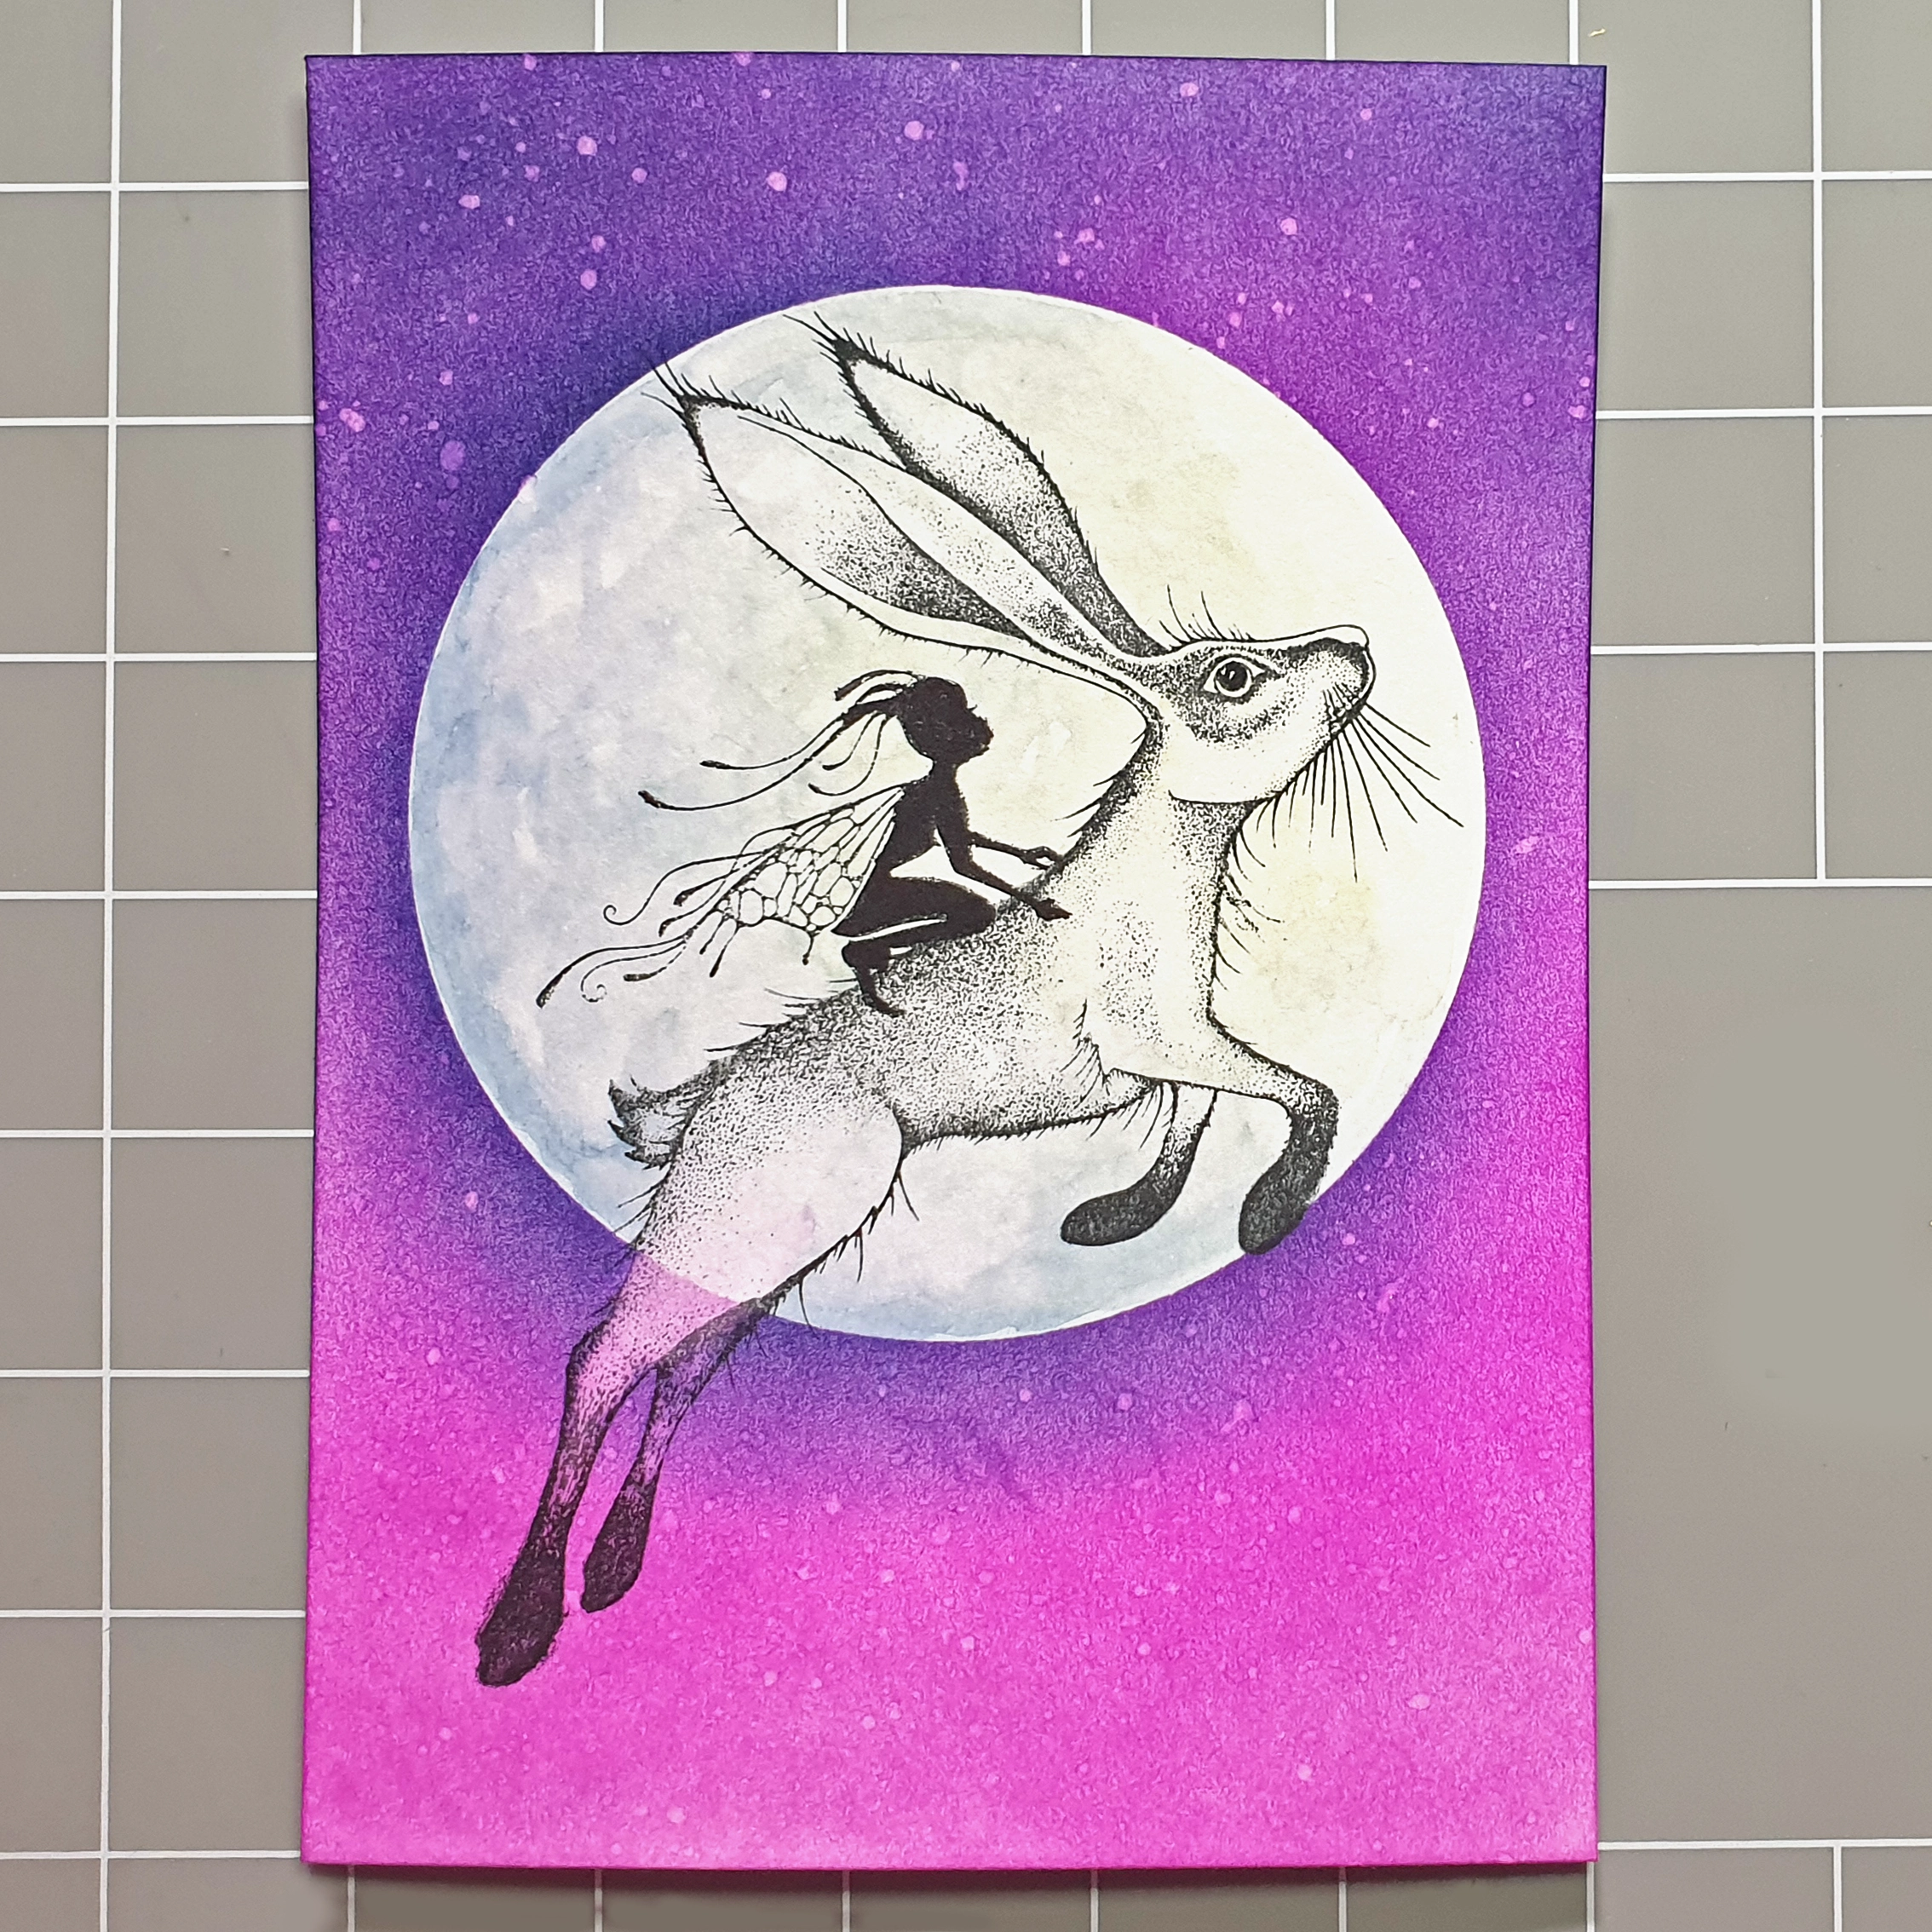
Start with a piece of Lavinia watercolour card measuring 105x150mm. Take the inner circle from Stencil number 5 set. If it is the first time you have used it, then take some of the sticky off first by pressing it on some scrap paper a few times.
Stick it on the card as shown and then start to add your Elements ink. I use stencil brush number 7 and begin by inking up the bottom third of the card with Spun Candy, working from the bottom up. Then for the central third I use Pink Elephant, Flying Fig for the top. Blend the three segments together by overlapping the layers.
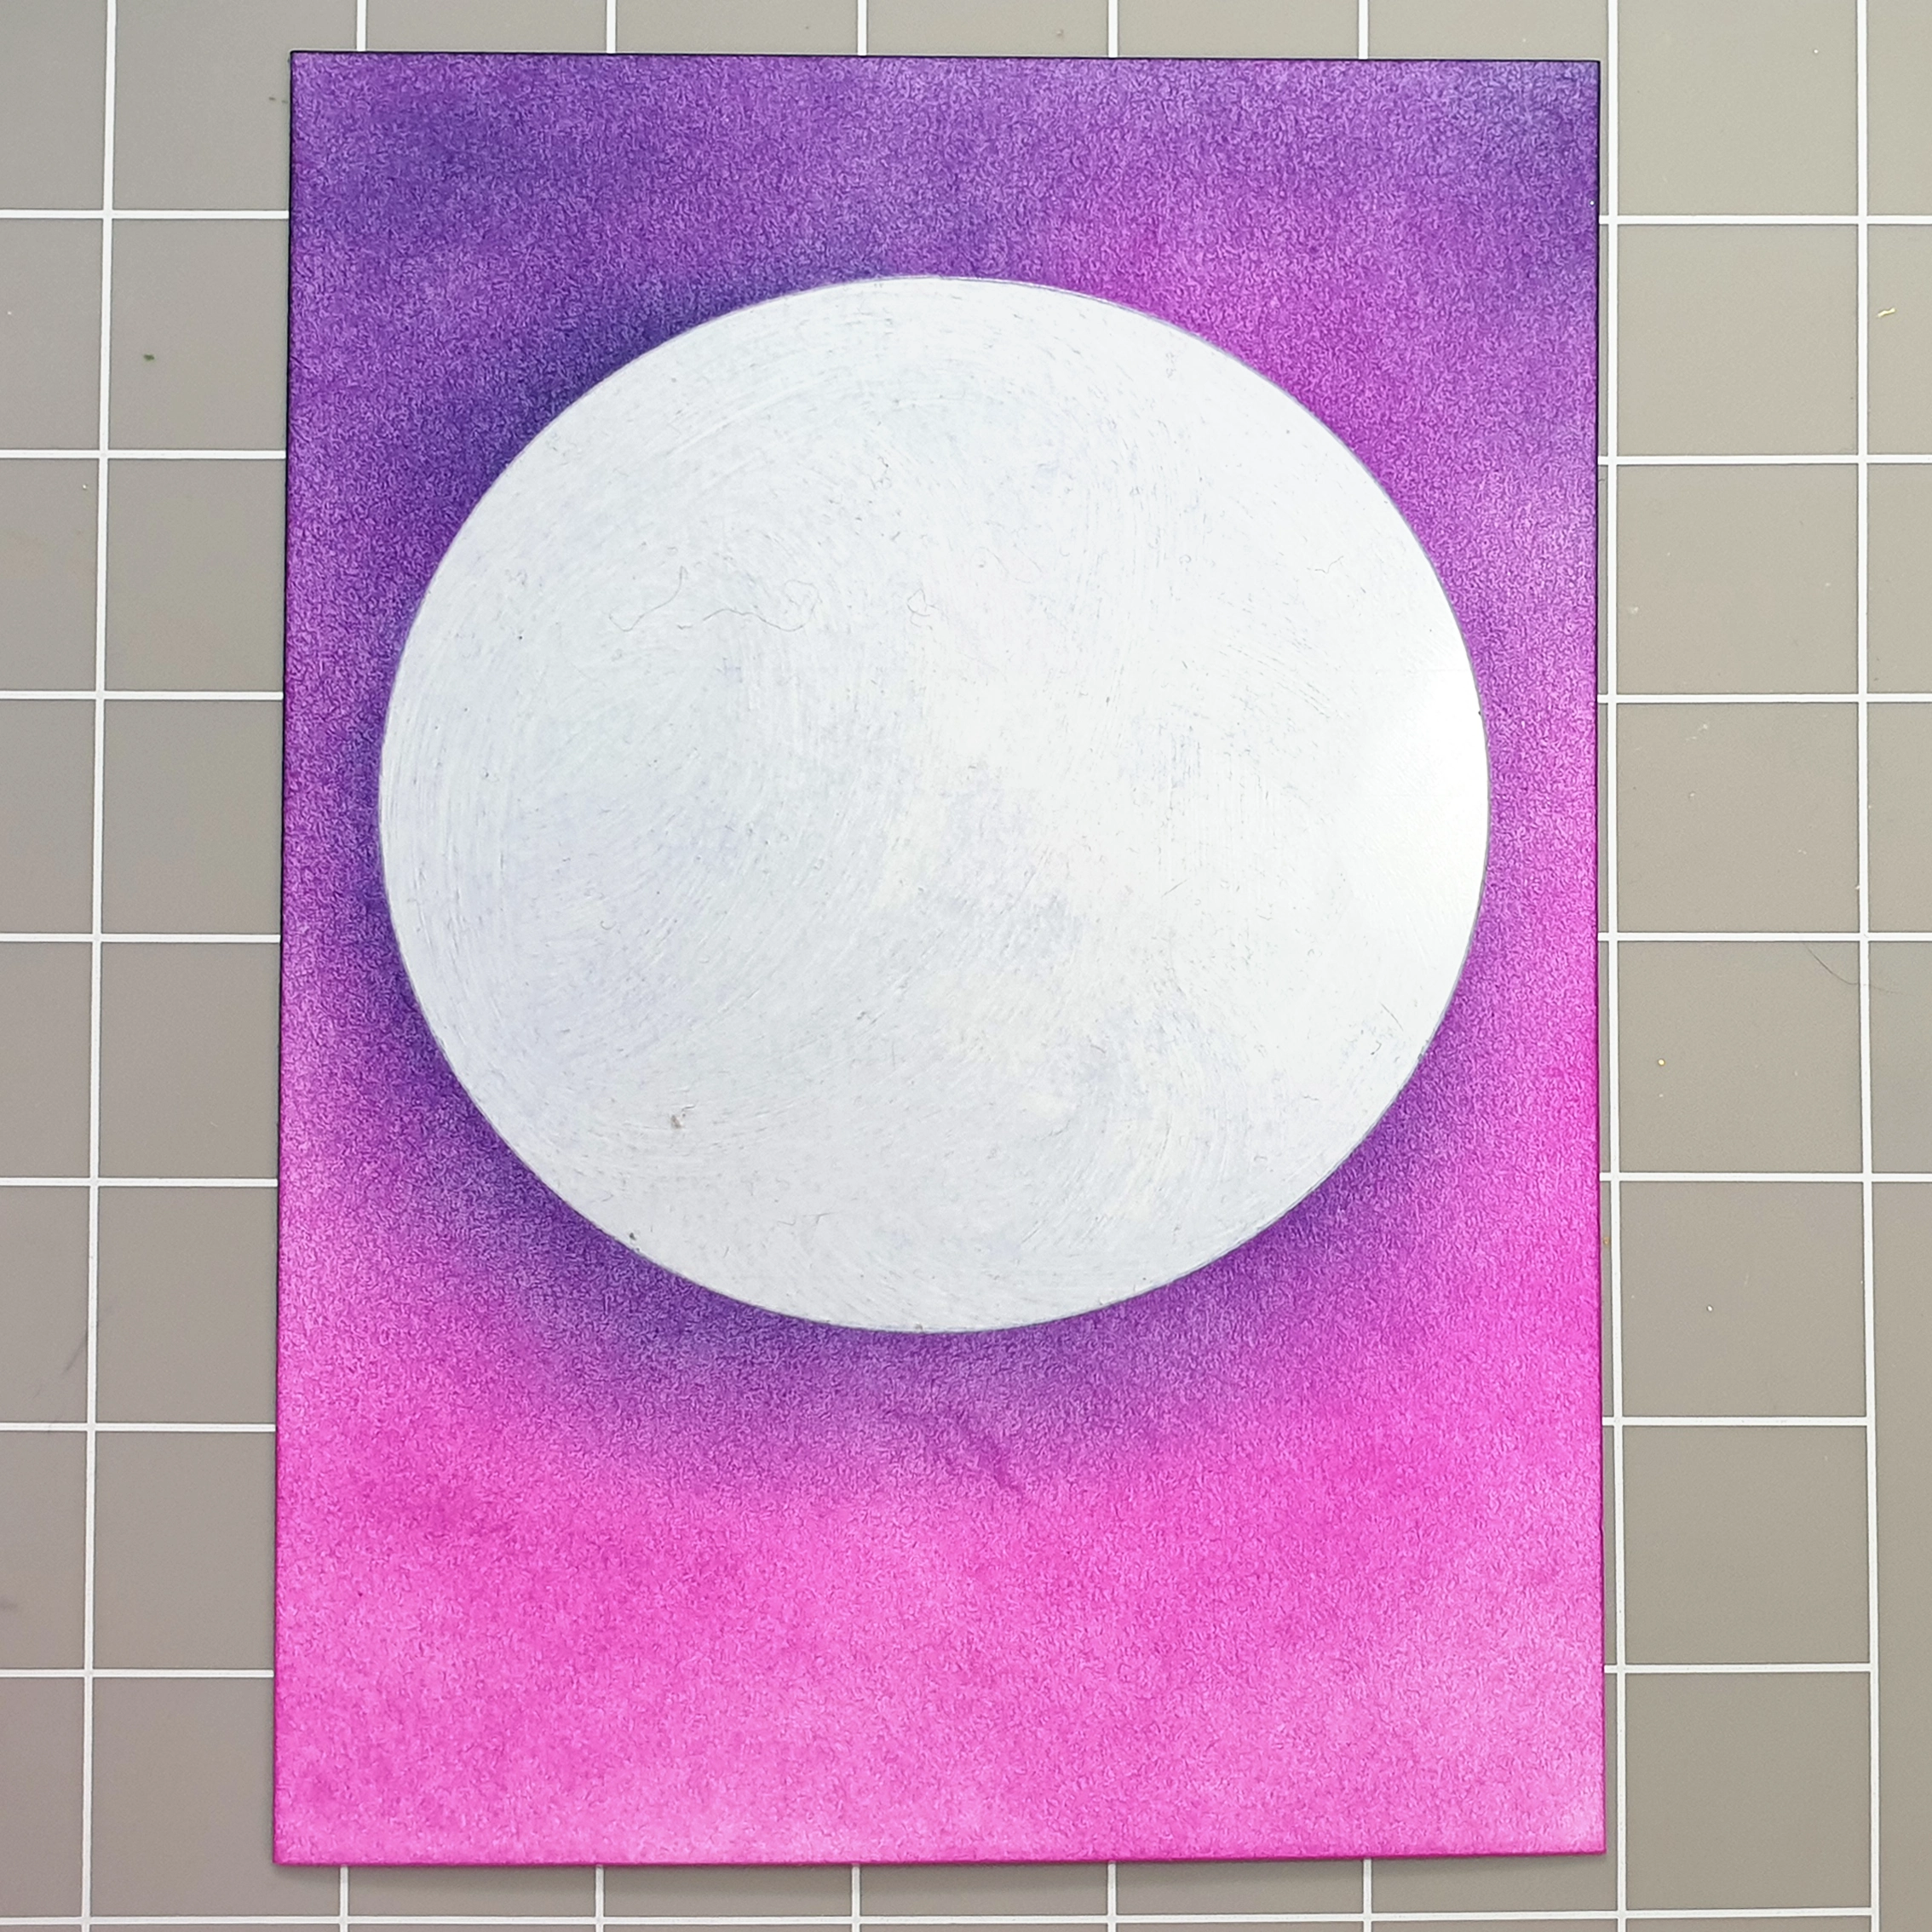
Step 2.
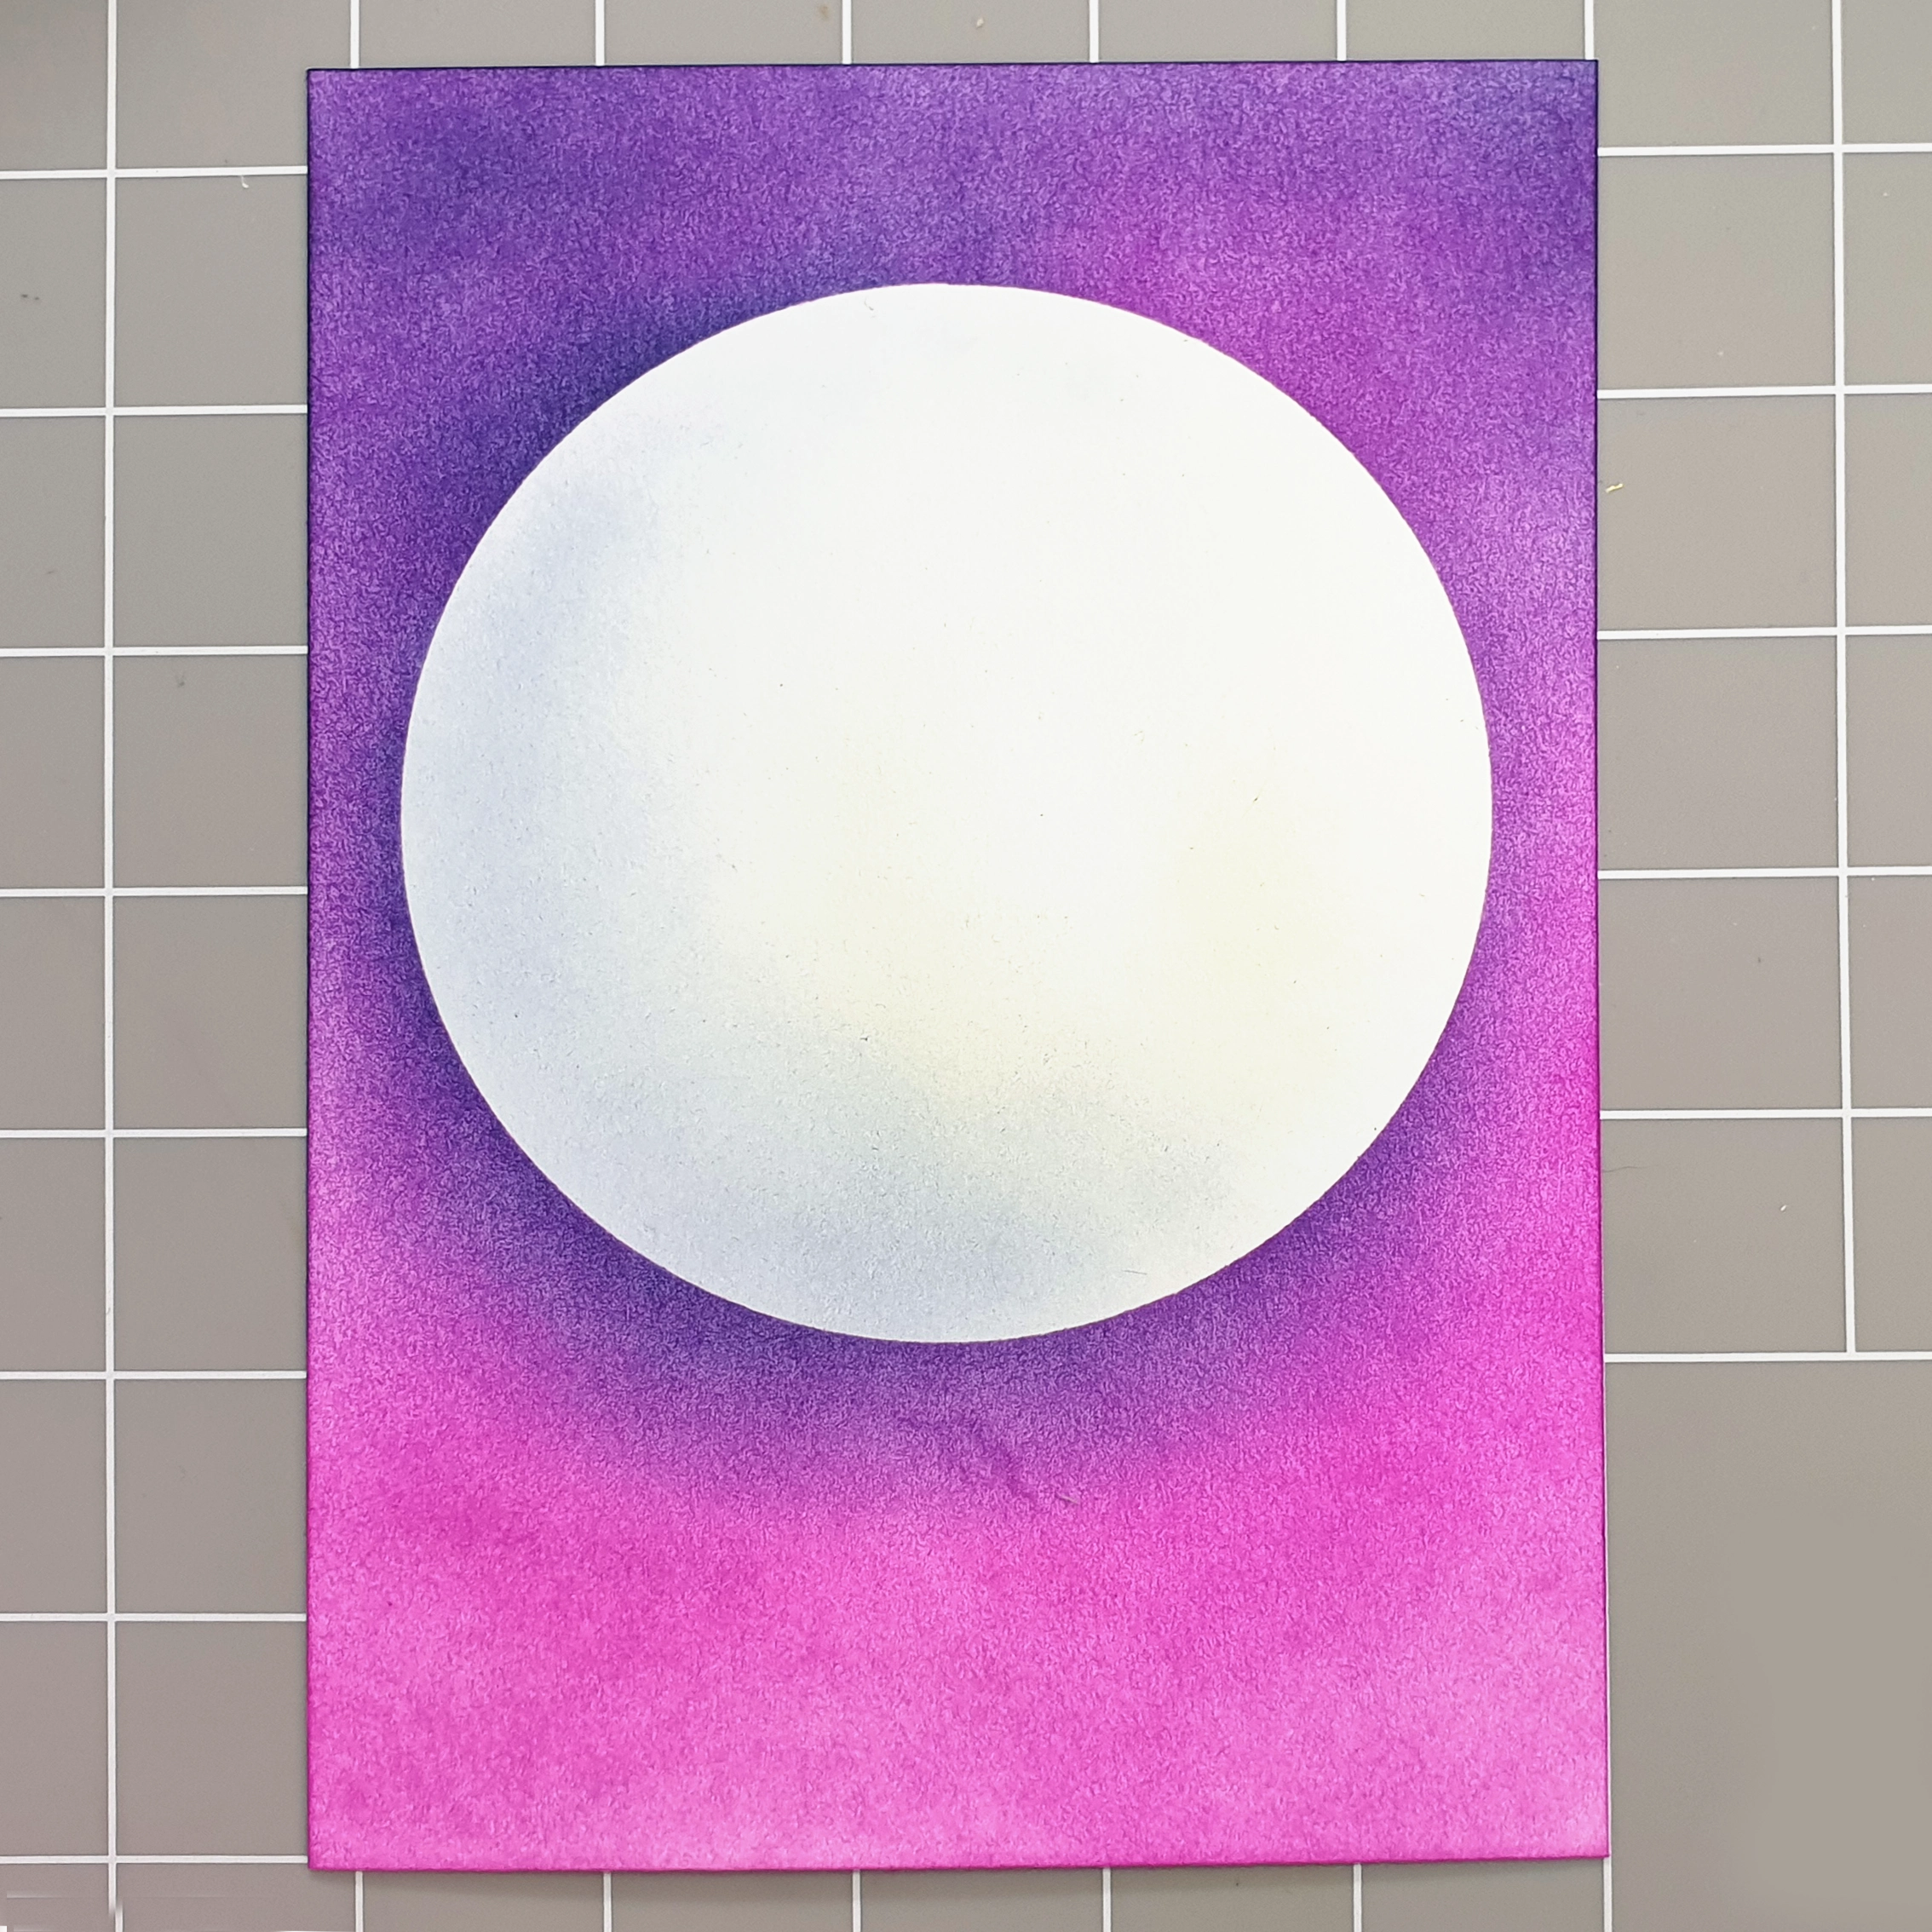
Now we will add some depth to the sky by adding Dark Denim.
Introduce the colour gently to the top edge and move it down to the moon. Move onto the moon mask now and start by placing the brush onto the mask and gently swirling the colour around the perimeter on the card. Focus the darkest of the shading around the left 2/3 of the moon, in a C shape. This way it makes the moon glow on the right hand side, the direction that Logan is leaping.
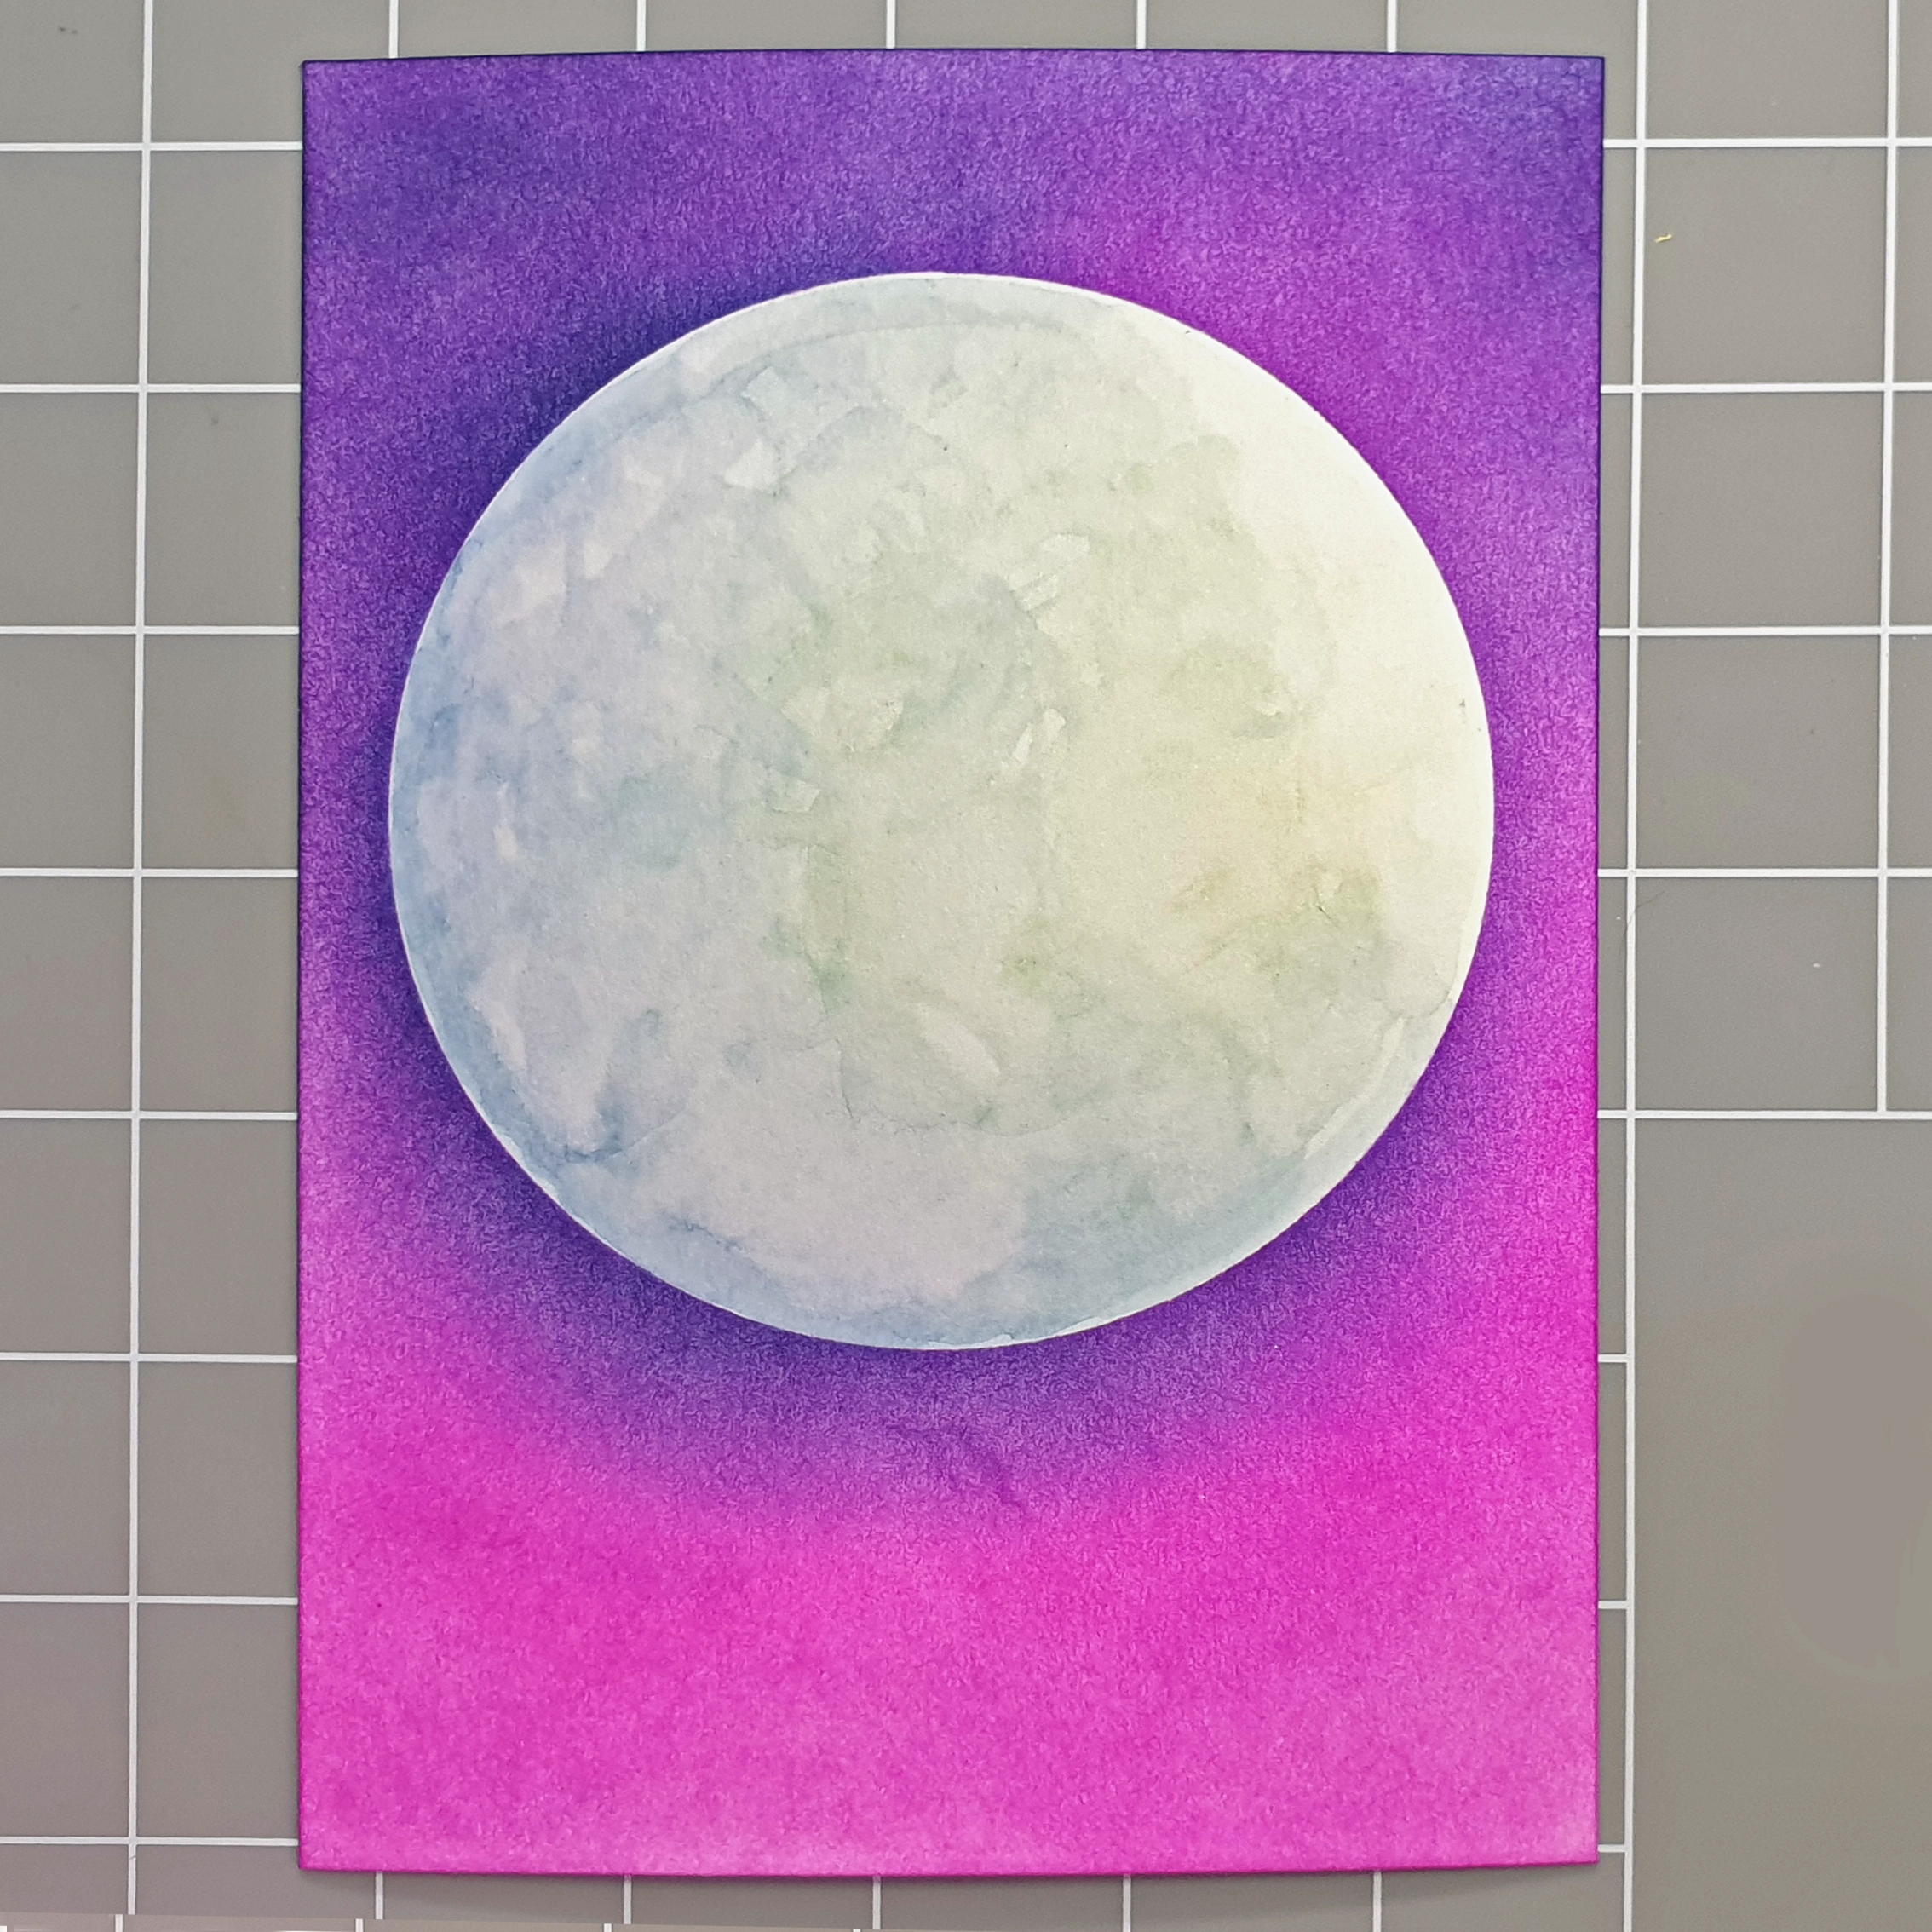
Step 3.
Wipe any excess ink off the mask and gently lift the circle off. Before you put it away draw around the circle on a piece of copier paper. We will use this in a moment. Wipe off any excess Dark Denim off the stencil brush on copier paper, then gently swirl the subtle colour remaining on the brush over the moon itself in a C shape motion. We only want a very soft amount of shading. Ink up a Number 7 brush in Lemon Drop and again take the excess ink off on copier paper. Add some subtle yellow shading to the right-hand side of the moon.
Step 4.
Using a water brush pen, carefully start to move the ink inside the moon. Take care to go up to the edges but not extend into the pink or the colour will bleed. If you feel the colour is too strong, wet the ink and blot off excess with kitchen roll. Dry off with a heat tool if necessary.
Step 5.
Cut out your copier paper circle and lay it on top of the moon. Use a fan brush to splatter drops of water around the sky and blot with kitchen roll. Dry with a heat tool if necessary and remove the paper circle.
Step 6.
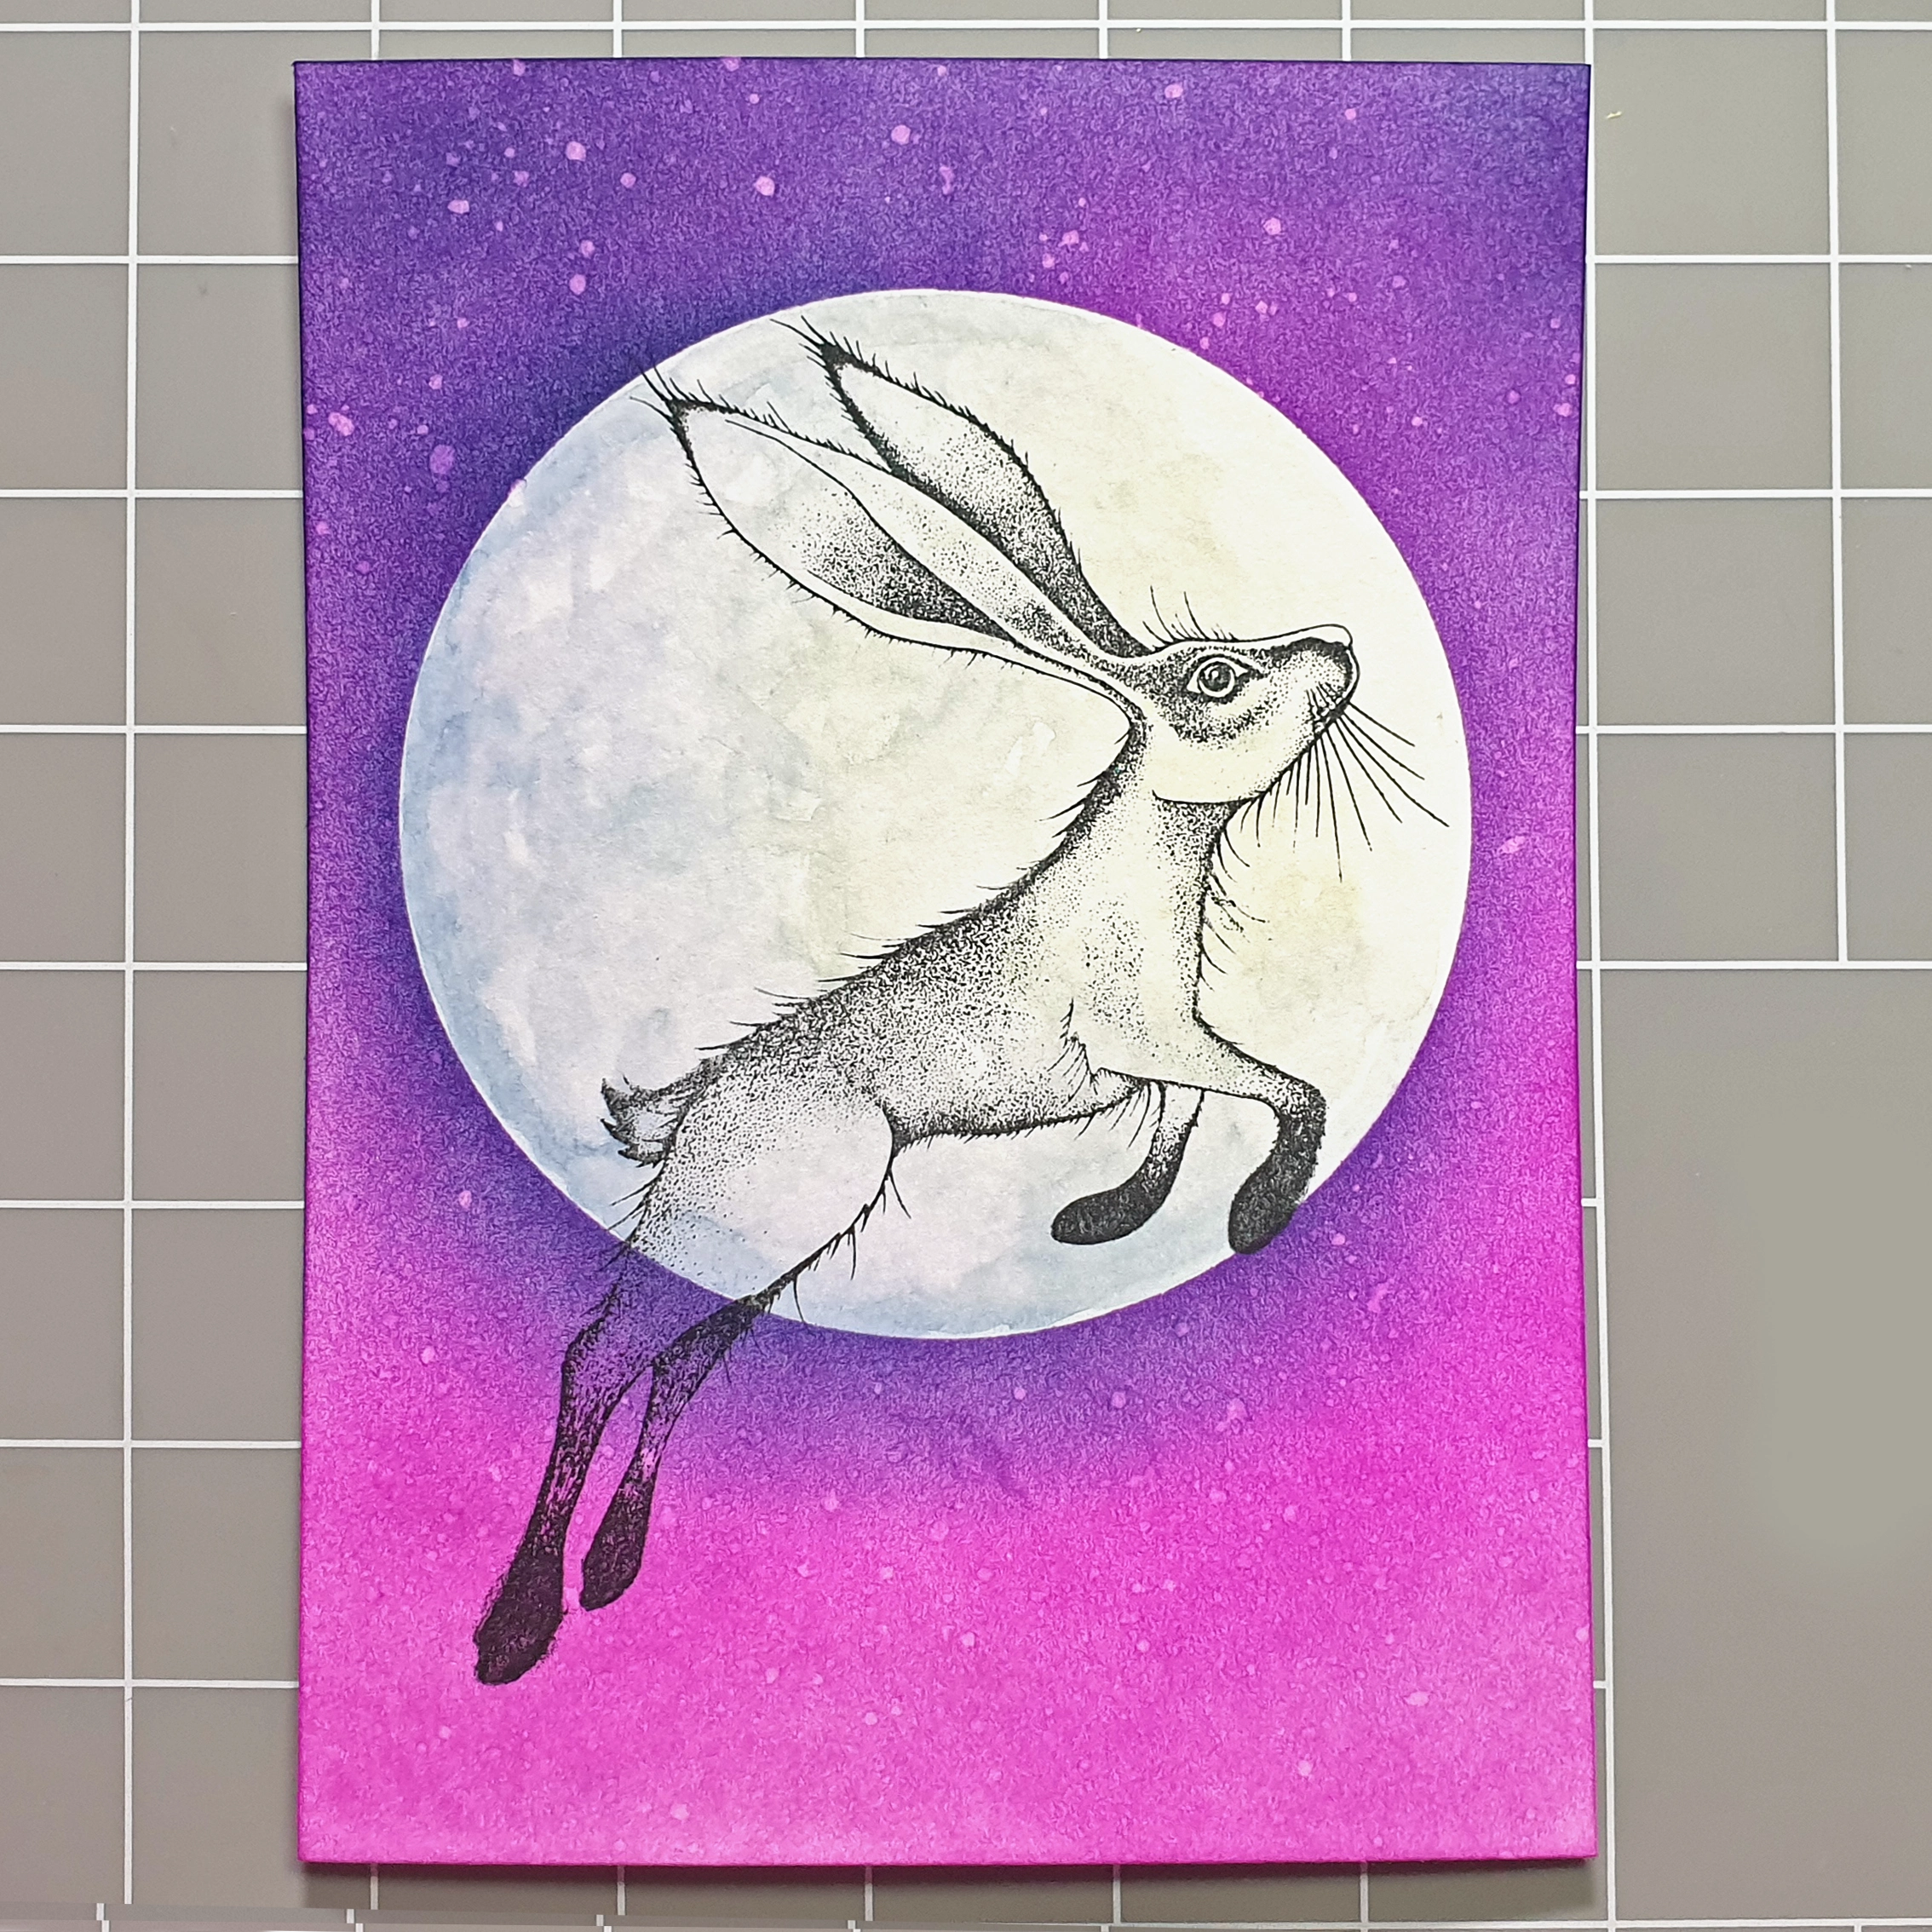
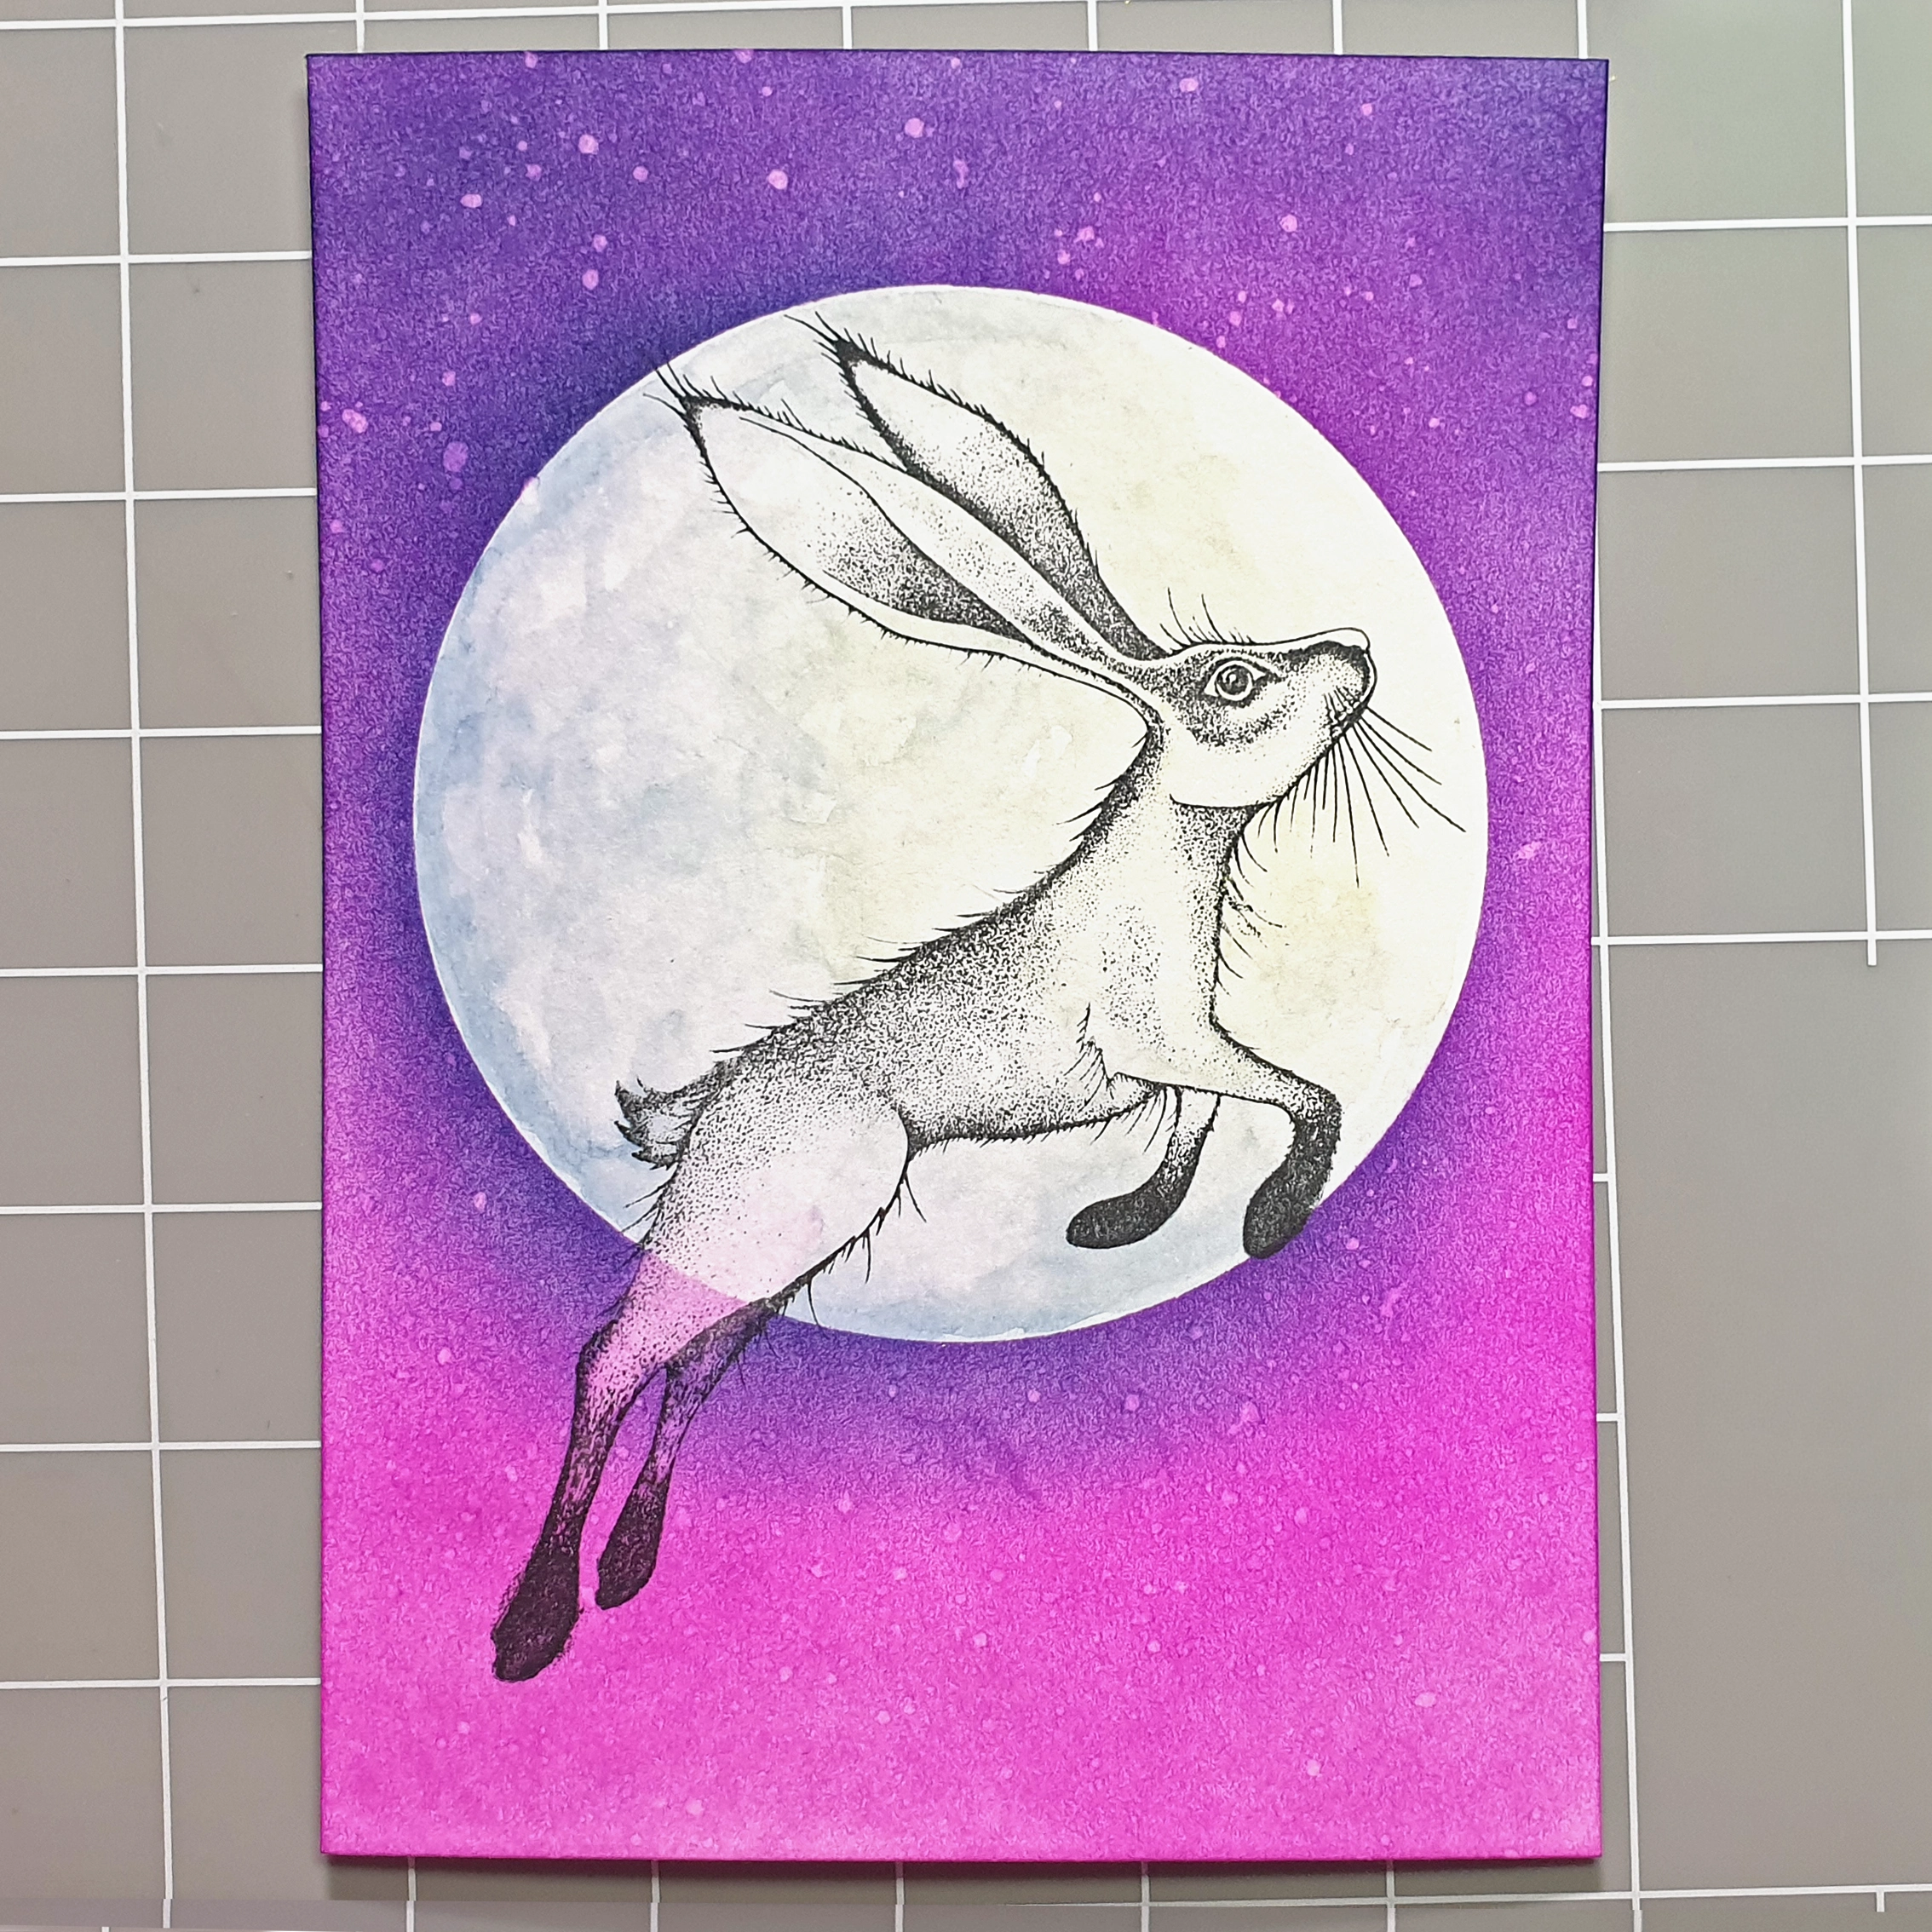
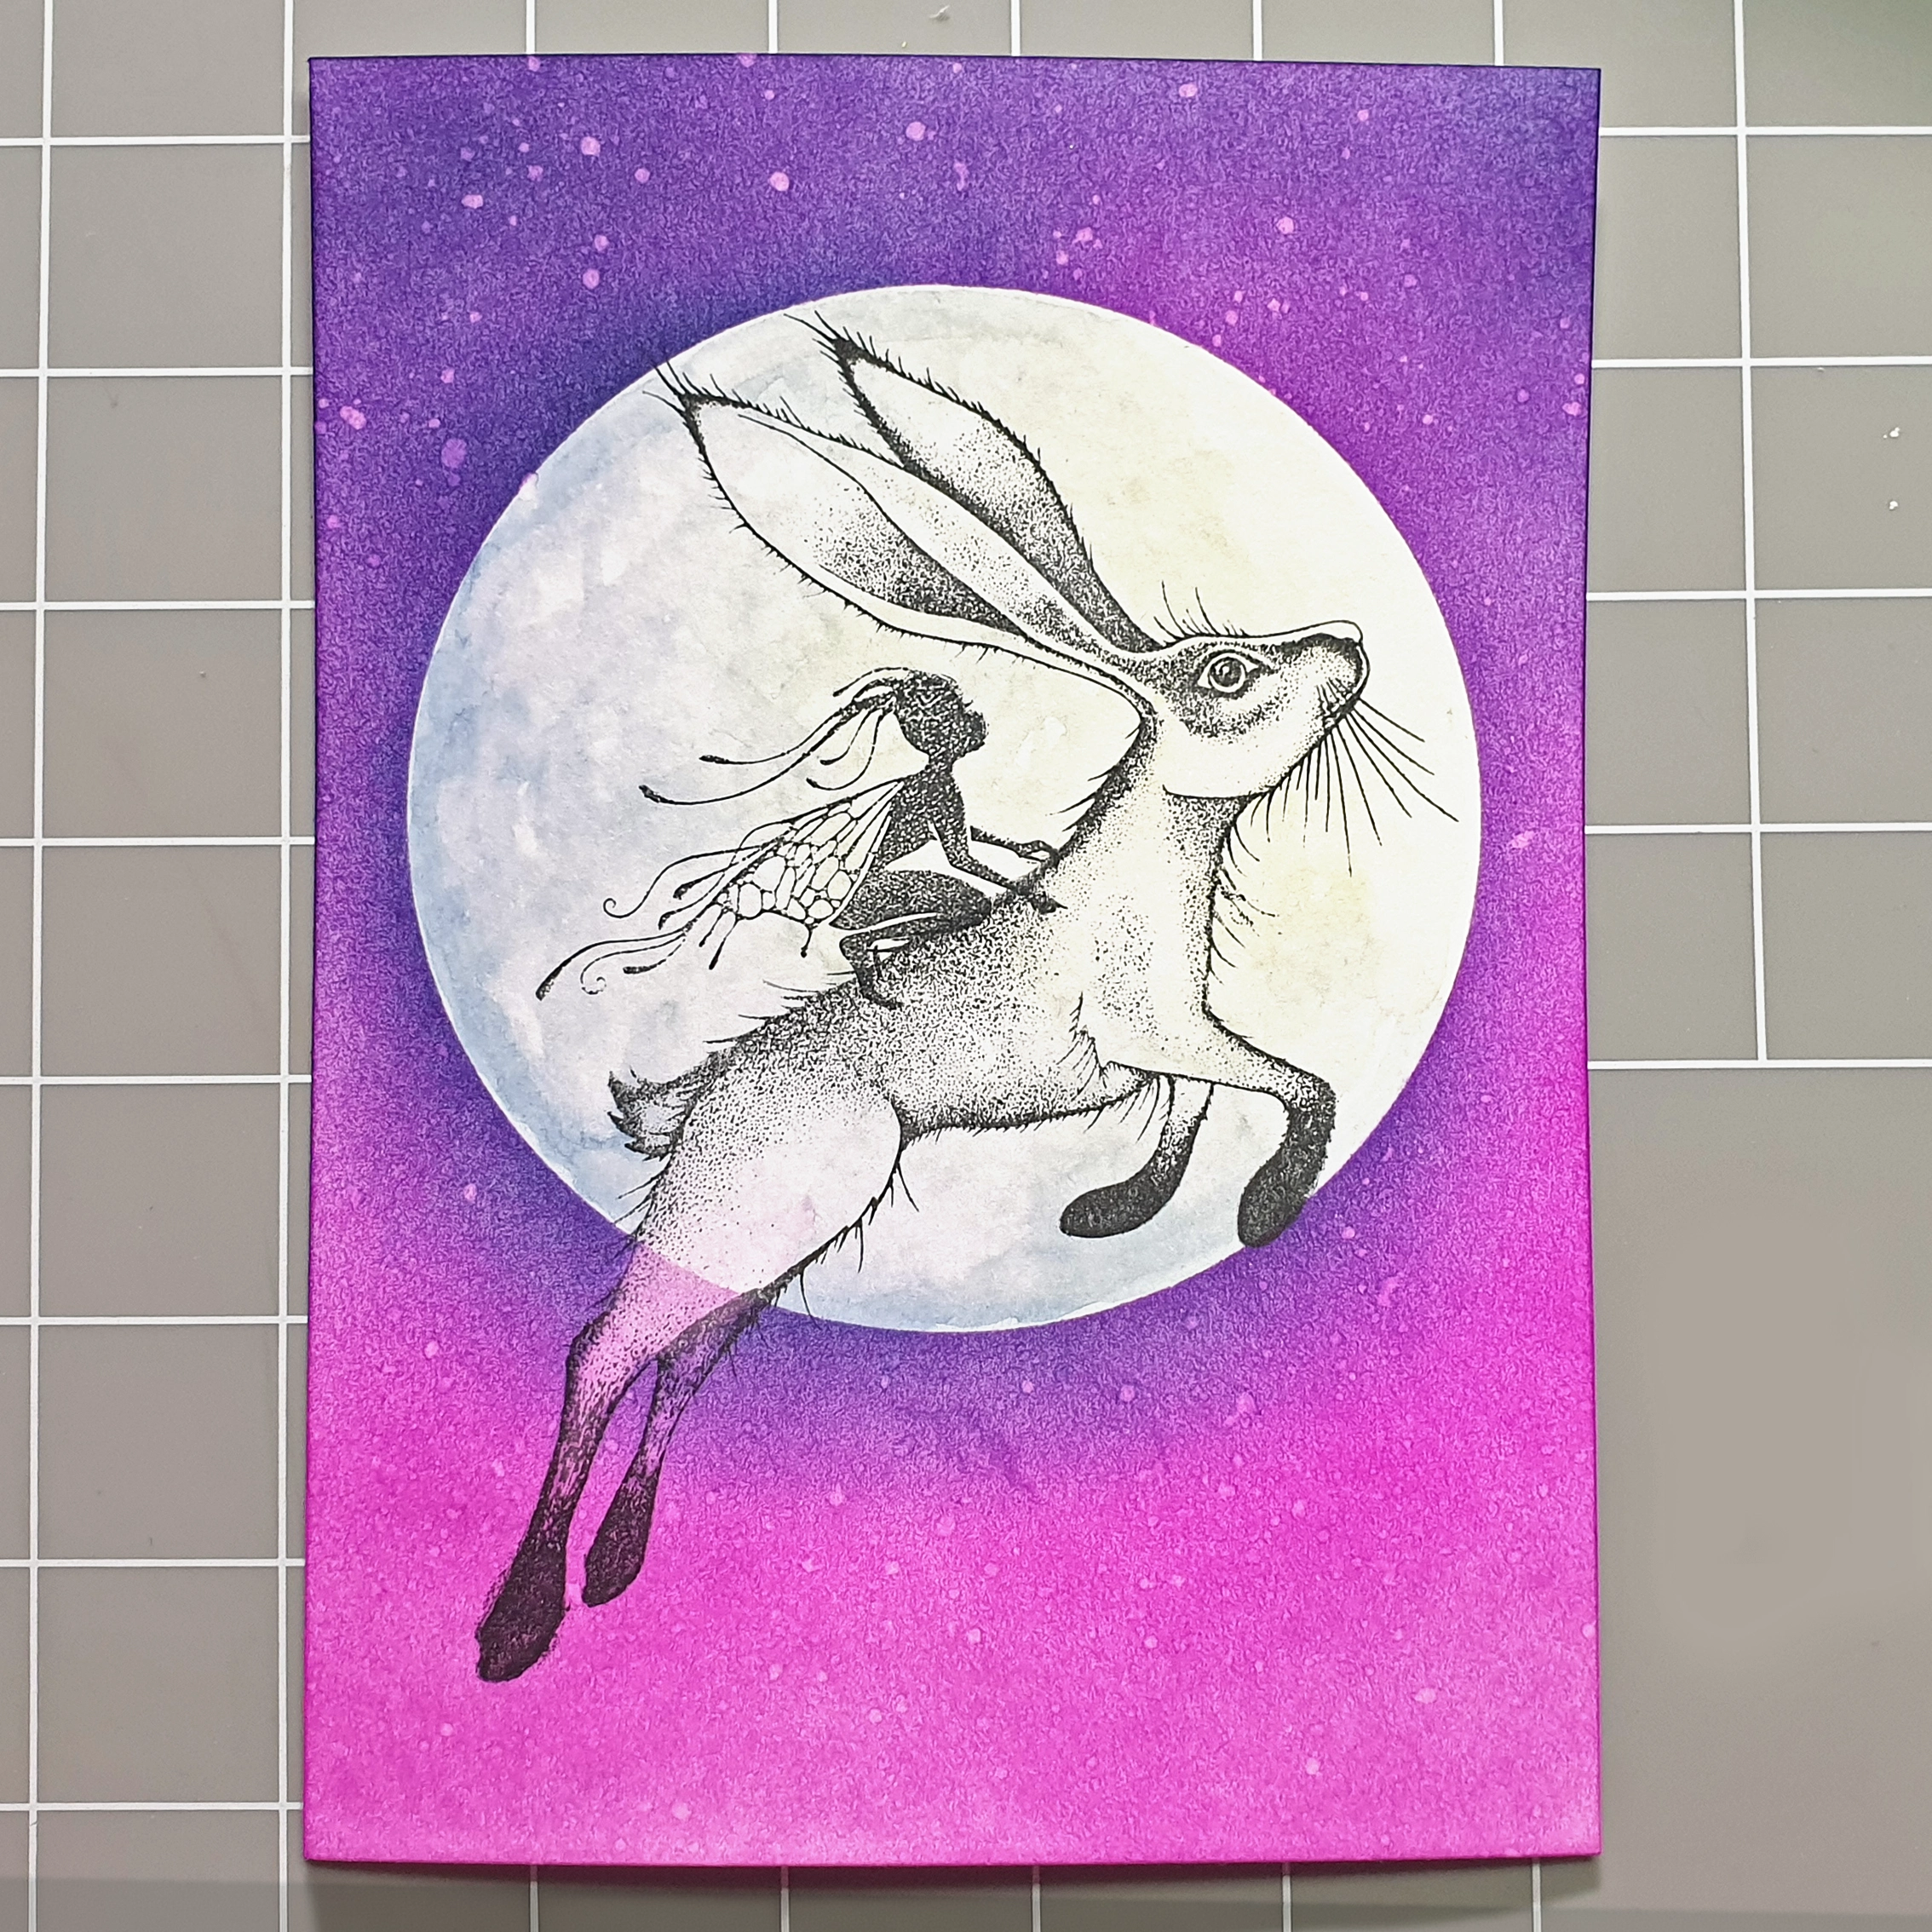
Ink up Logan in Versafine Nocturne and stamp him over the moon as shown.
Step 7.
Use a waterbrush pen to wet the pink ink inside Logan’s back leg and blot off with copier paper. This will make colouring over it a lot easier later on. Dry with a heat tool.
Step 8.
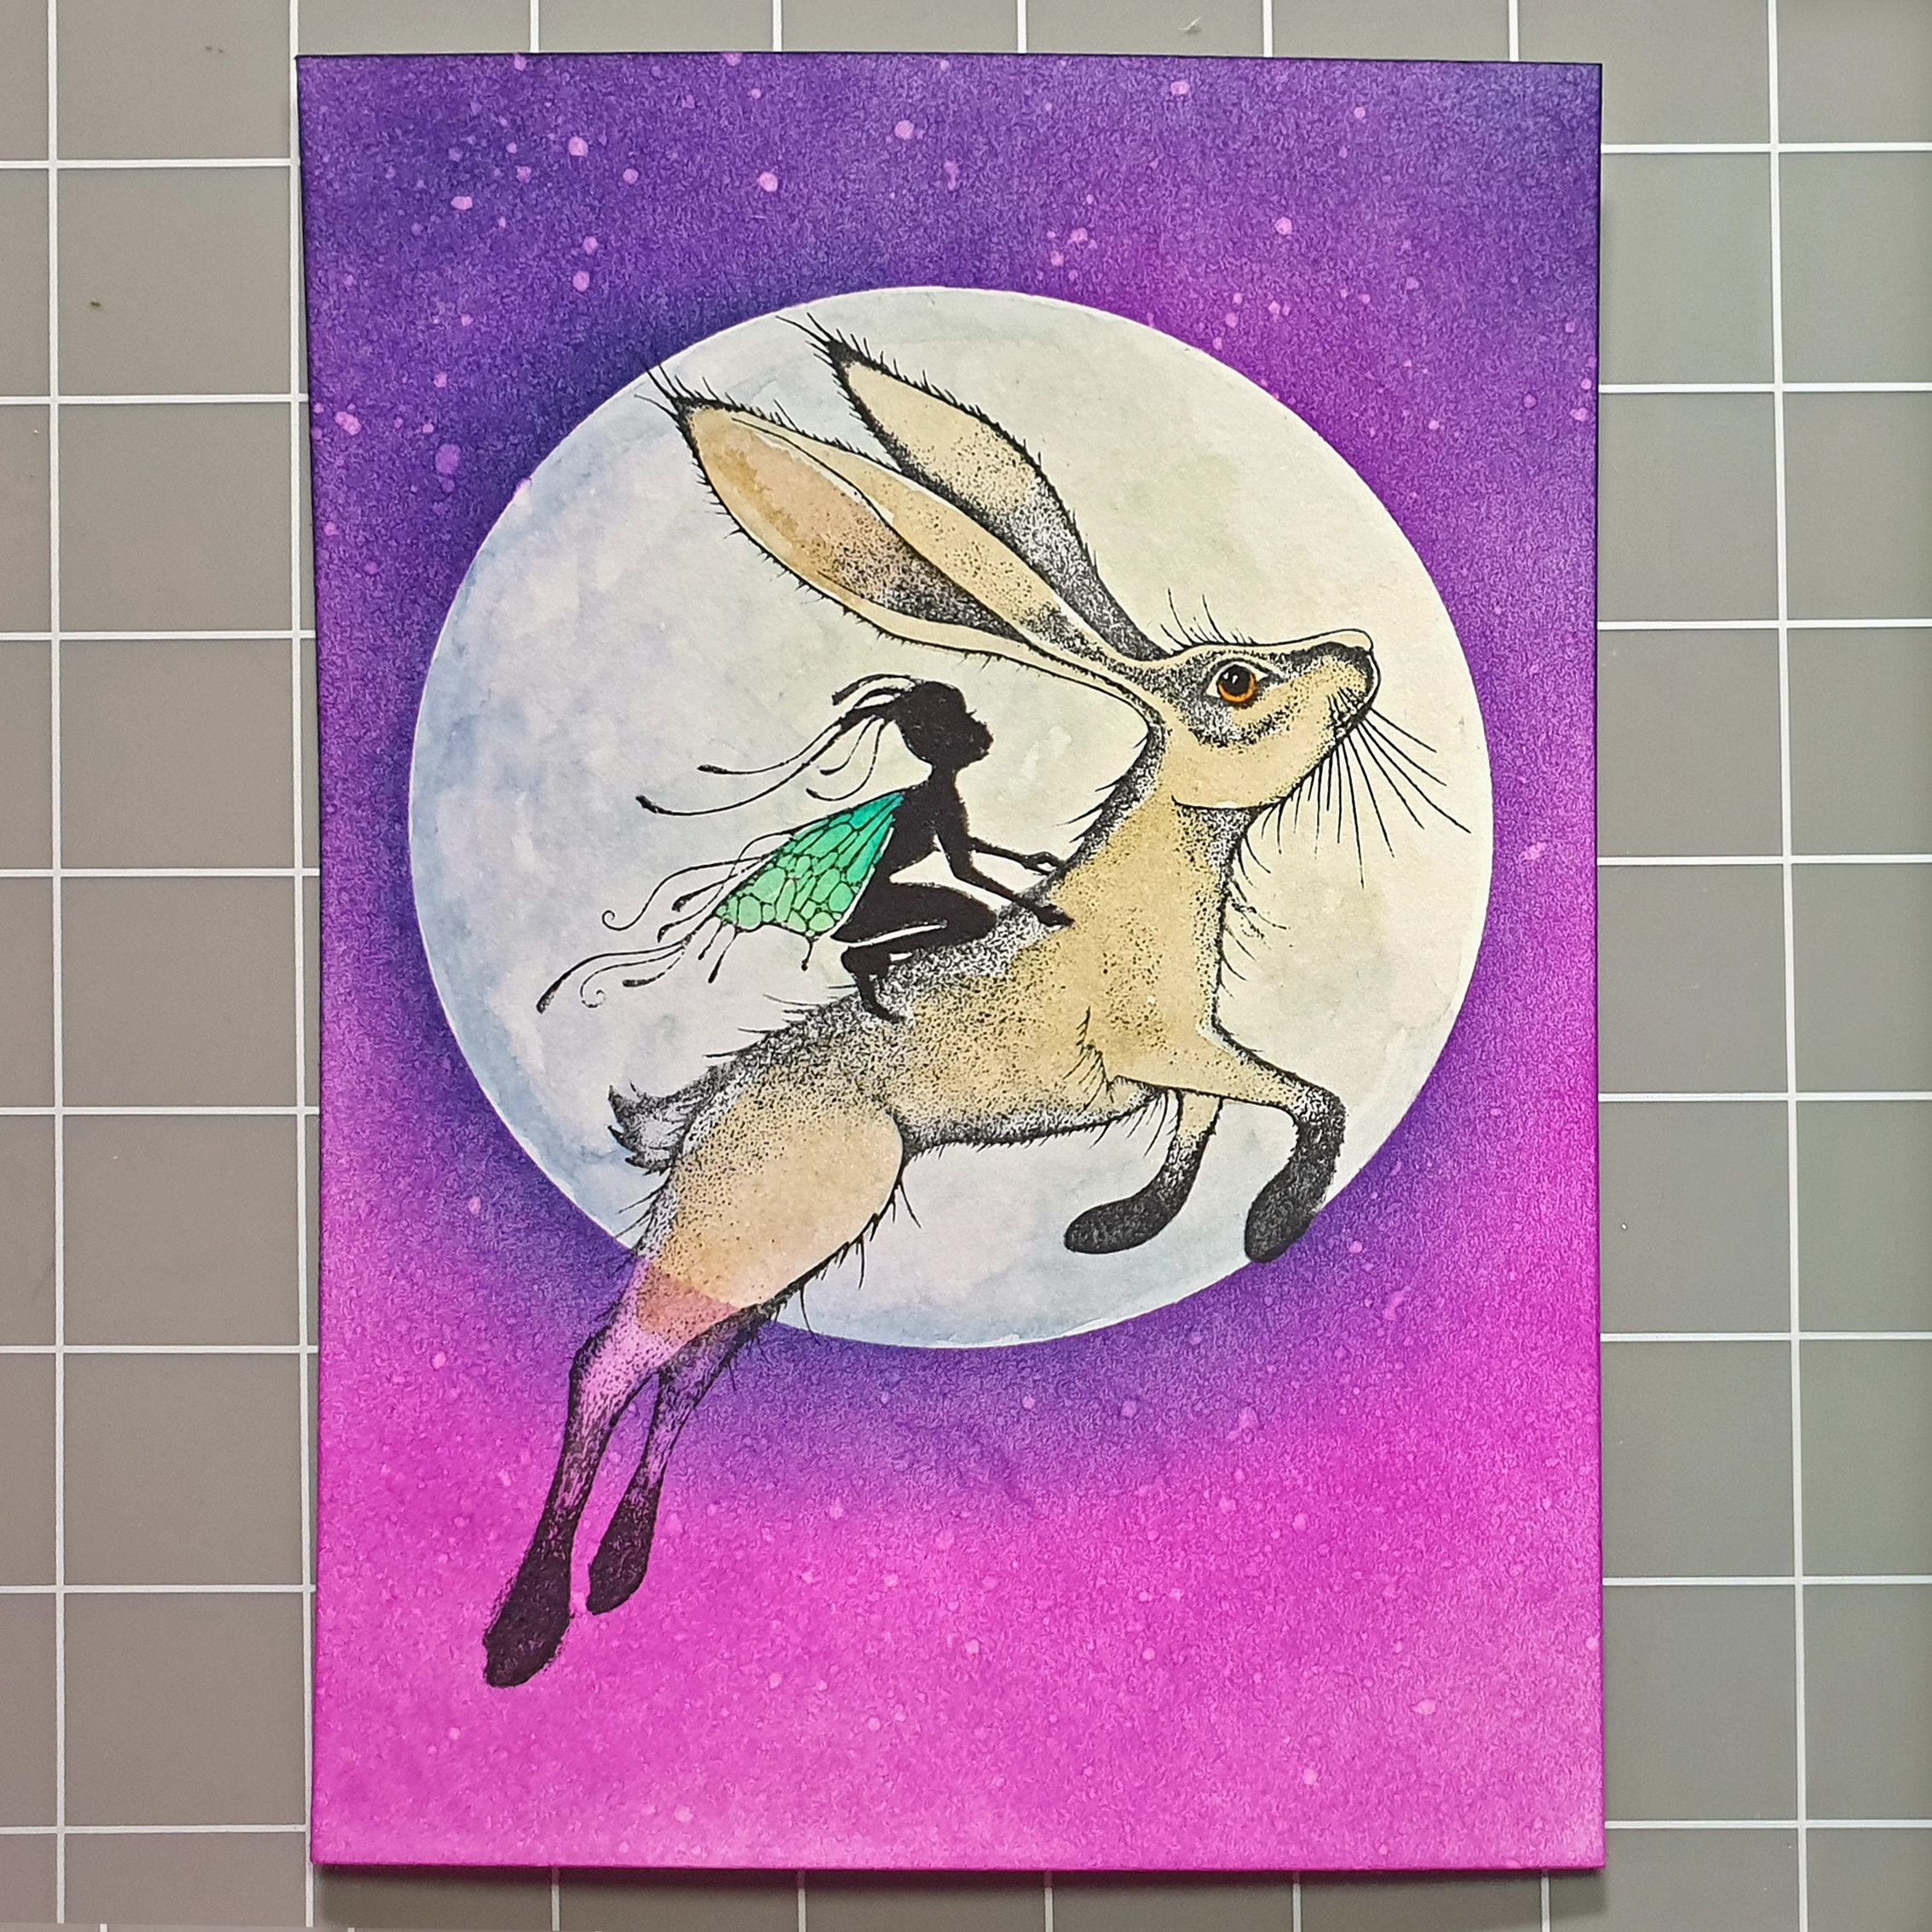
Ink up Nia in Nocturne. I take the ink off her back foot with kitchen roll so when I stamp her on Logan it looks like her back foot is hidden by Logan’s fur.
Step 9.
If Nia is a bit patchy then I use my Black Zig brush pen to fill in any colour missing, being careful not to go over the delicate details of her design. I also use a yellow Zig brush pen to add the colour to Logan’s eye. If you haven’t got the Zig pens you could also use pencils.
Step 10.
Using Zig pens again, I colour Nia’s wings in starting with a Teal near her body and drawing it to the tips of her wings using a lighter shade.

Step 11.
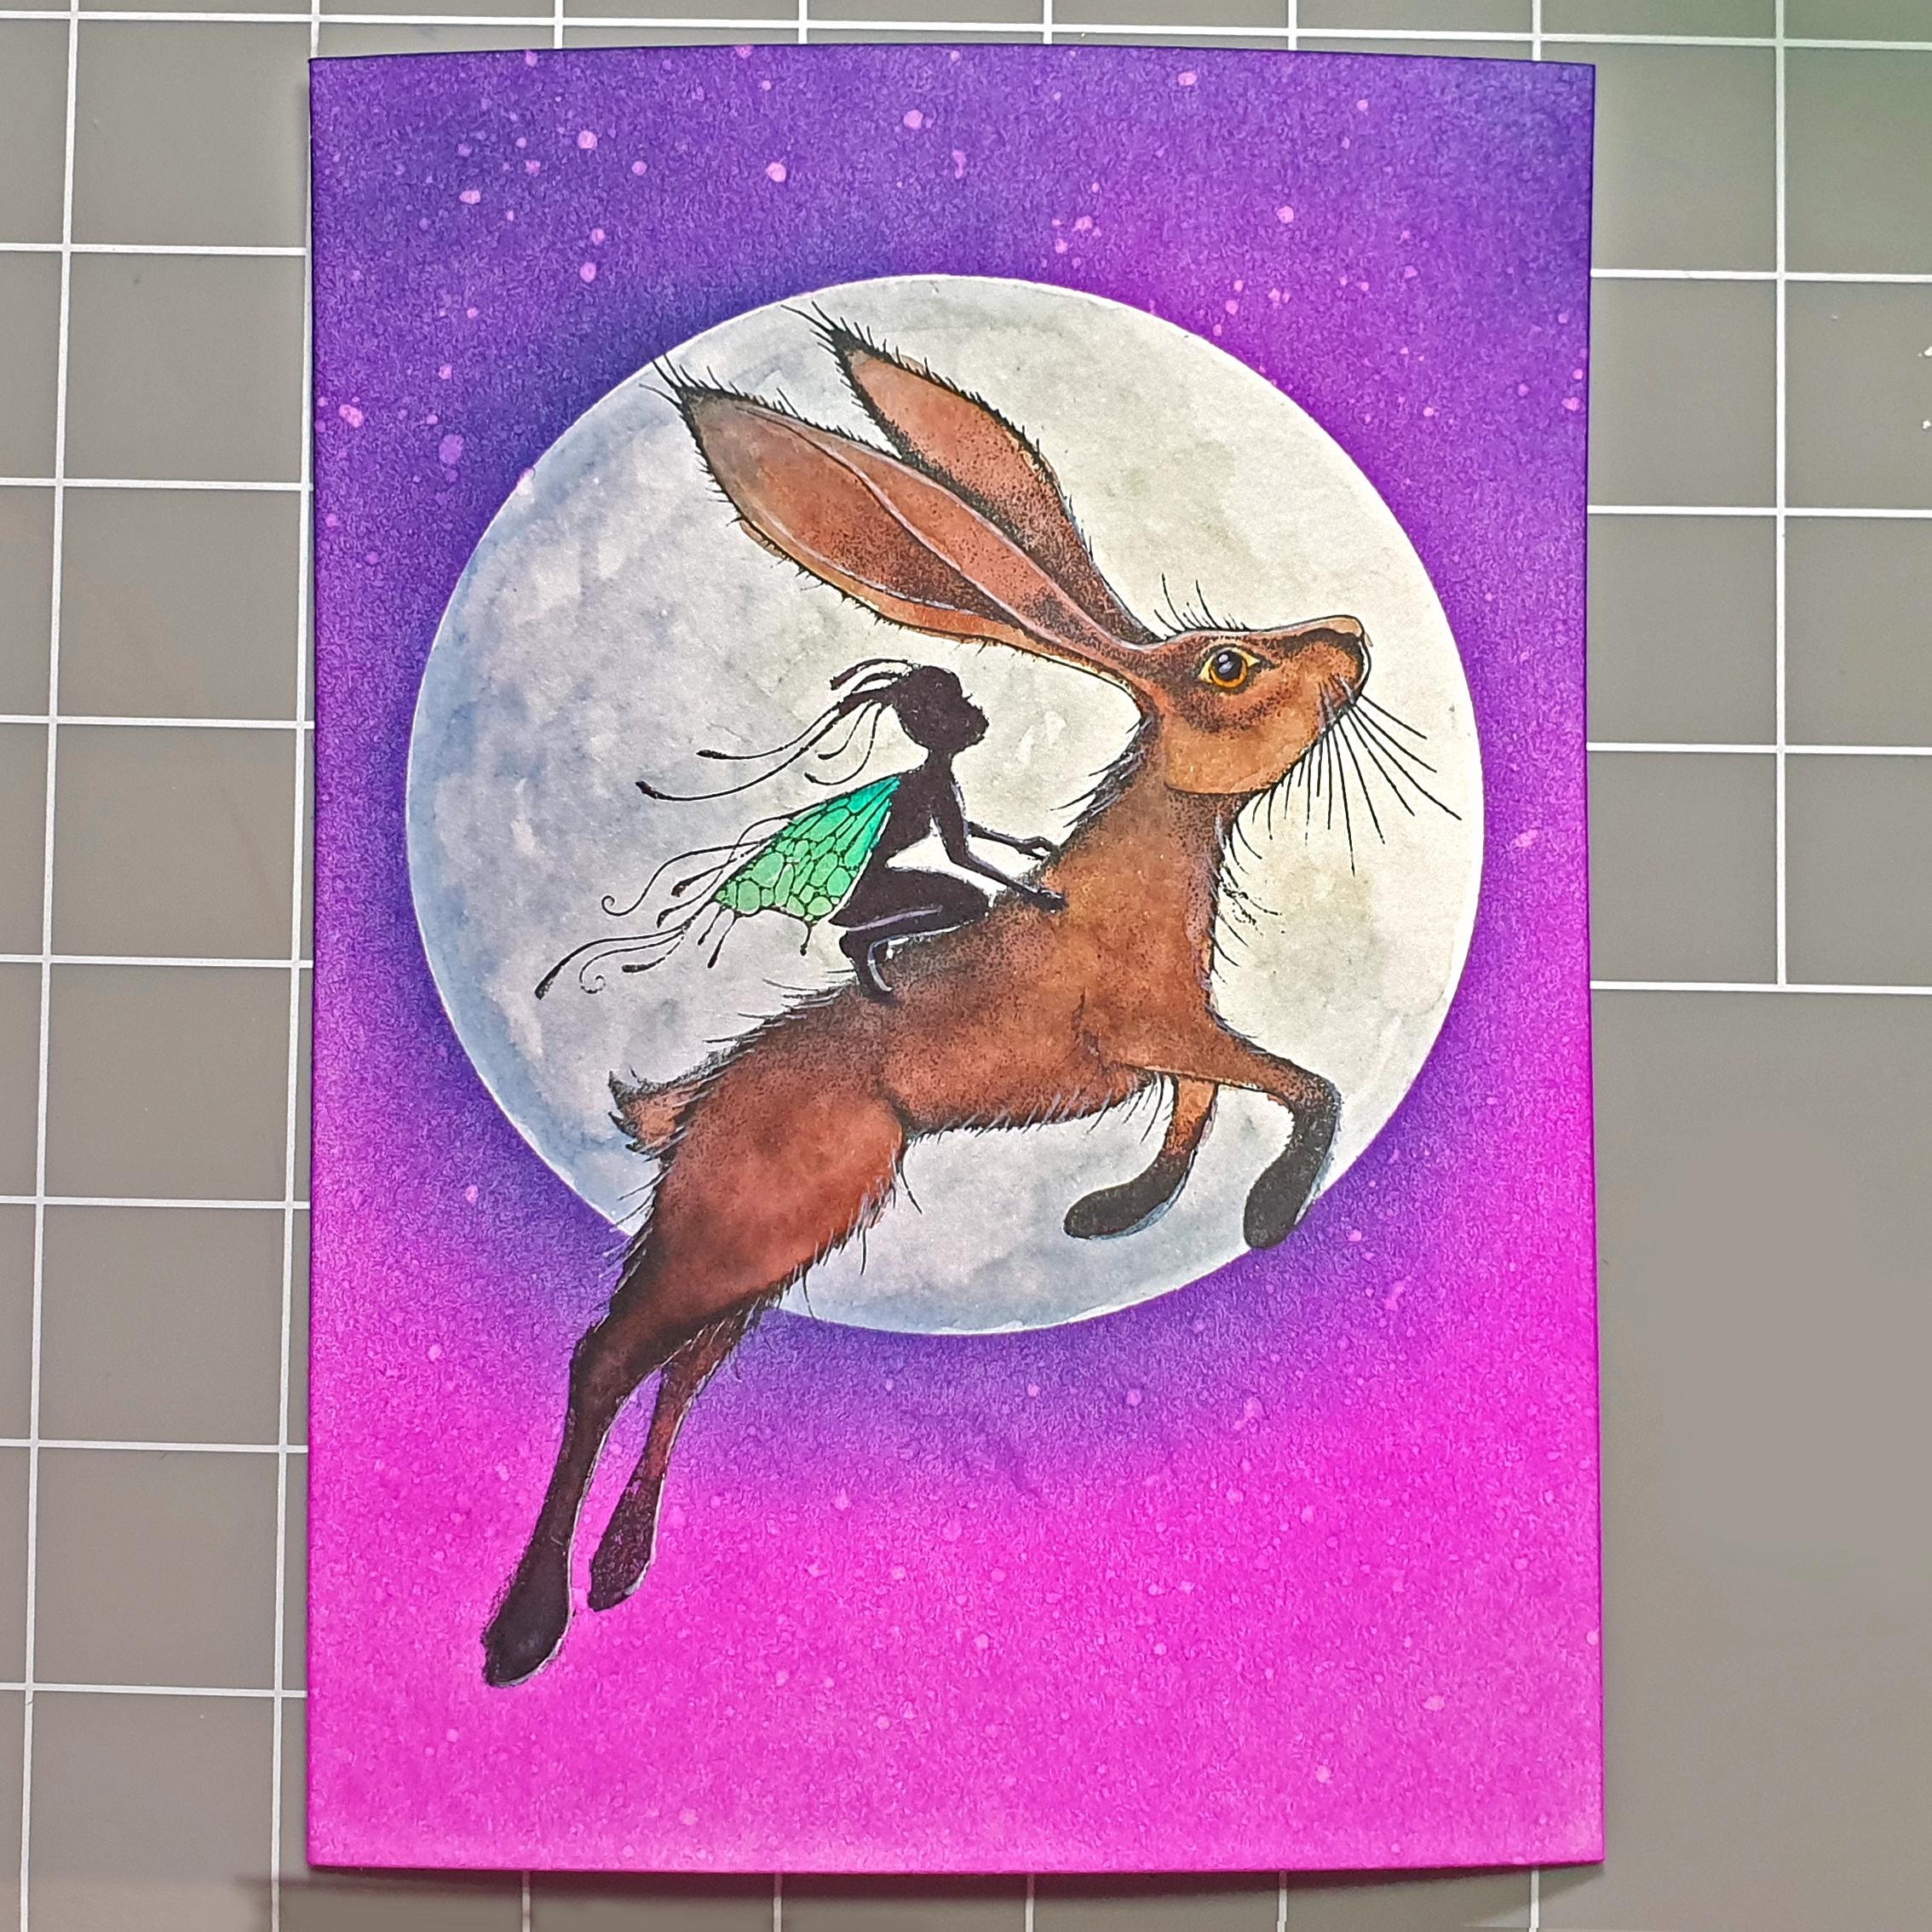
To colour in Logan, I use a flesh colour Zig pen inside his ear. Take a spare acrylic block and dab some Soft Cygnet, Truffle and Midnight Blue on it. Using a waterbrush pen to pick up colour, go over Logan’s lighter areas with the Cygnet.
Step 12.
Add some truffle in the same way, focusing on the more shaded areas. If you have a line where the moon outline goes through his leg, then dry off with a heat tool and add more truffle, layering up the colour. Add the midnight black to the darker areas and feet, paint shading underneath Nia.
Step 13.
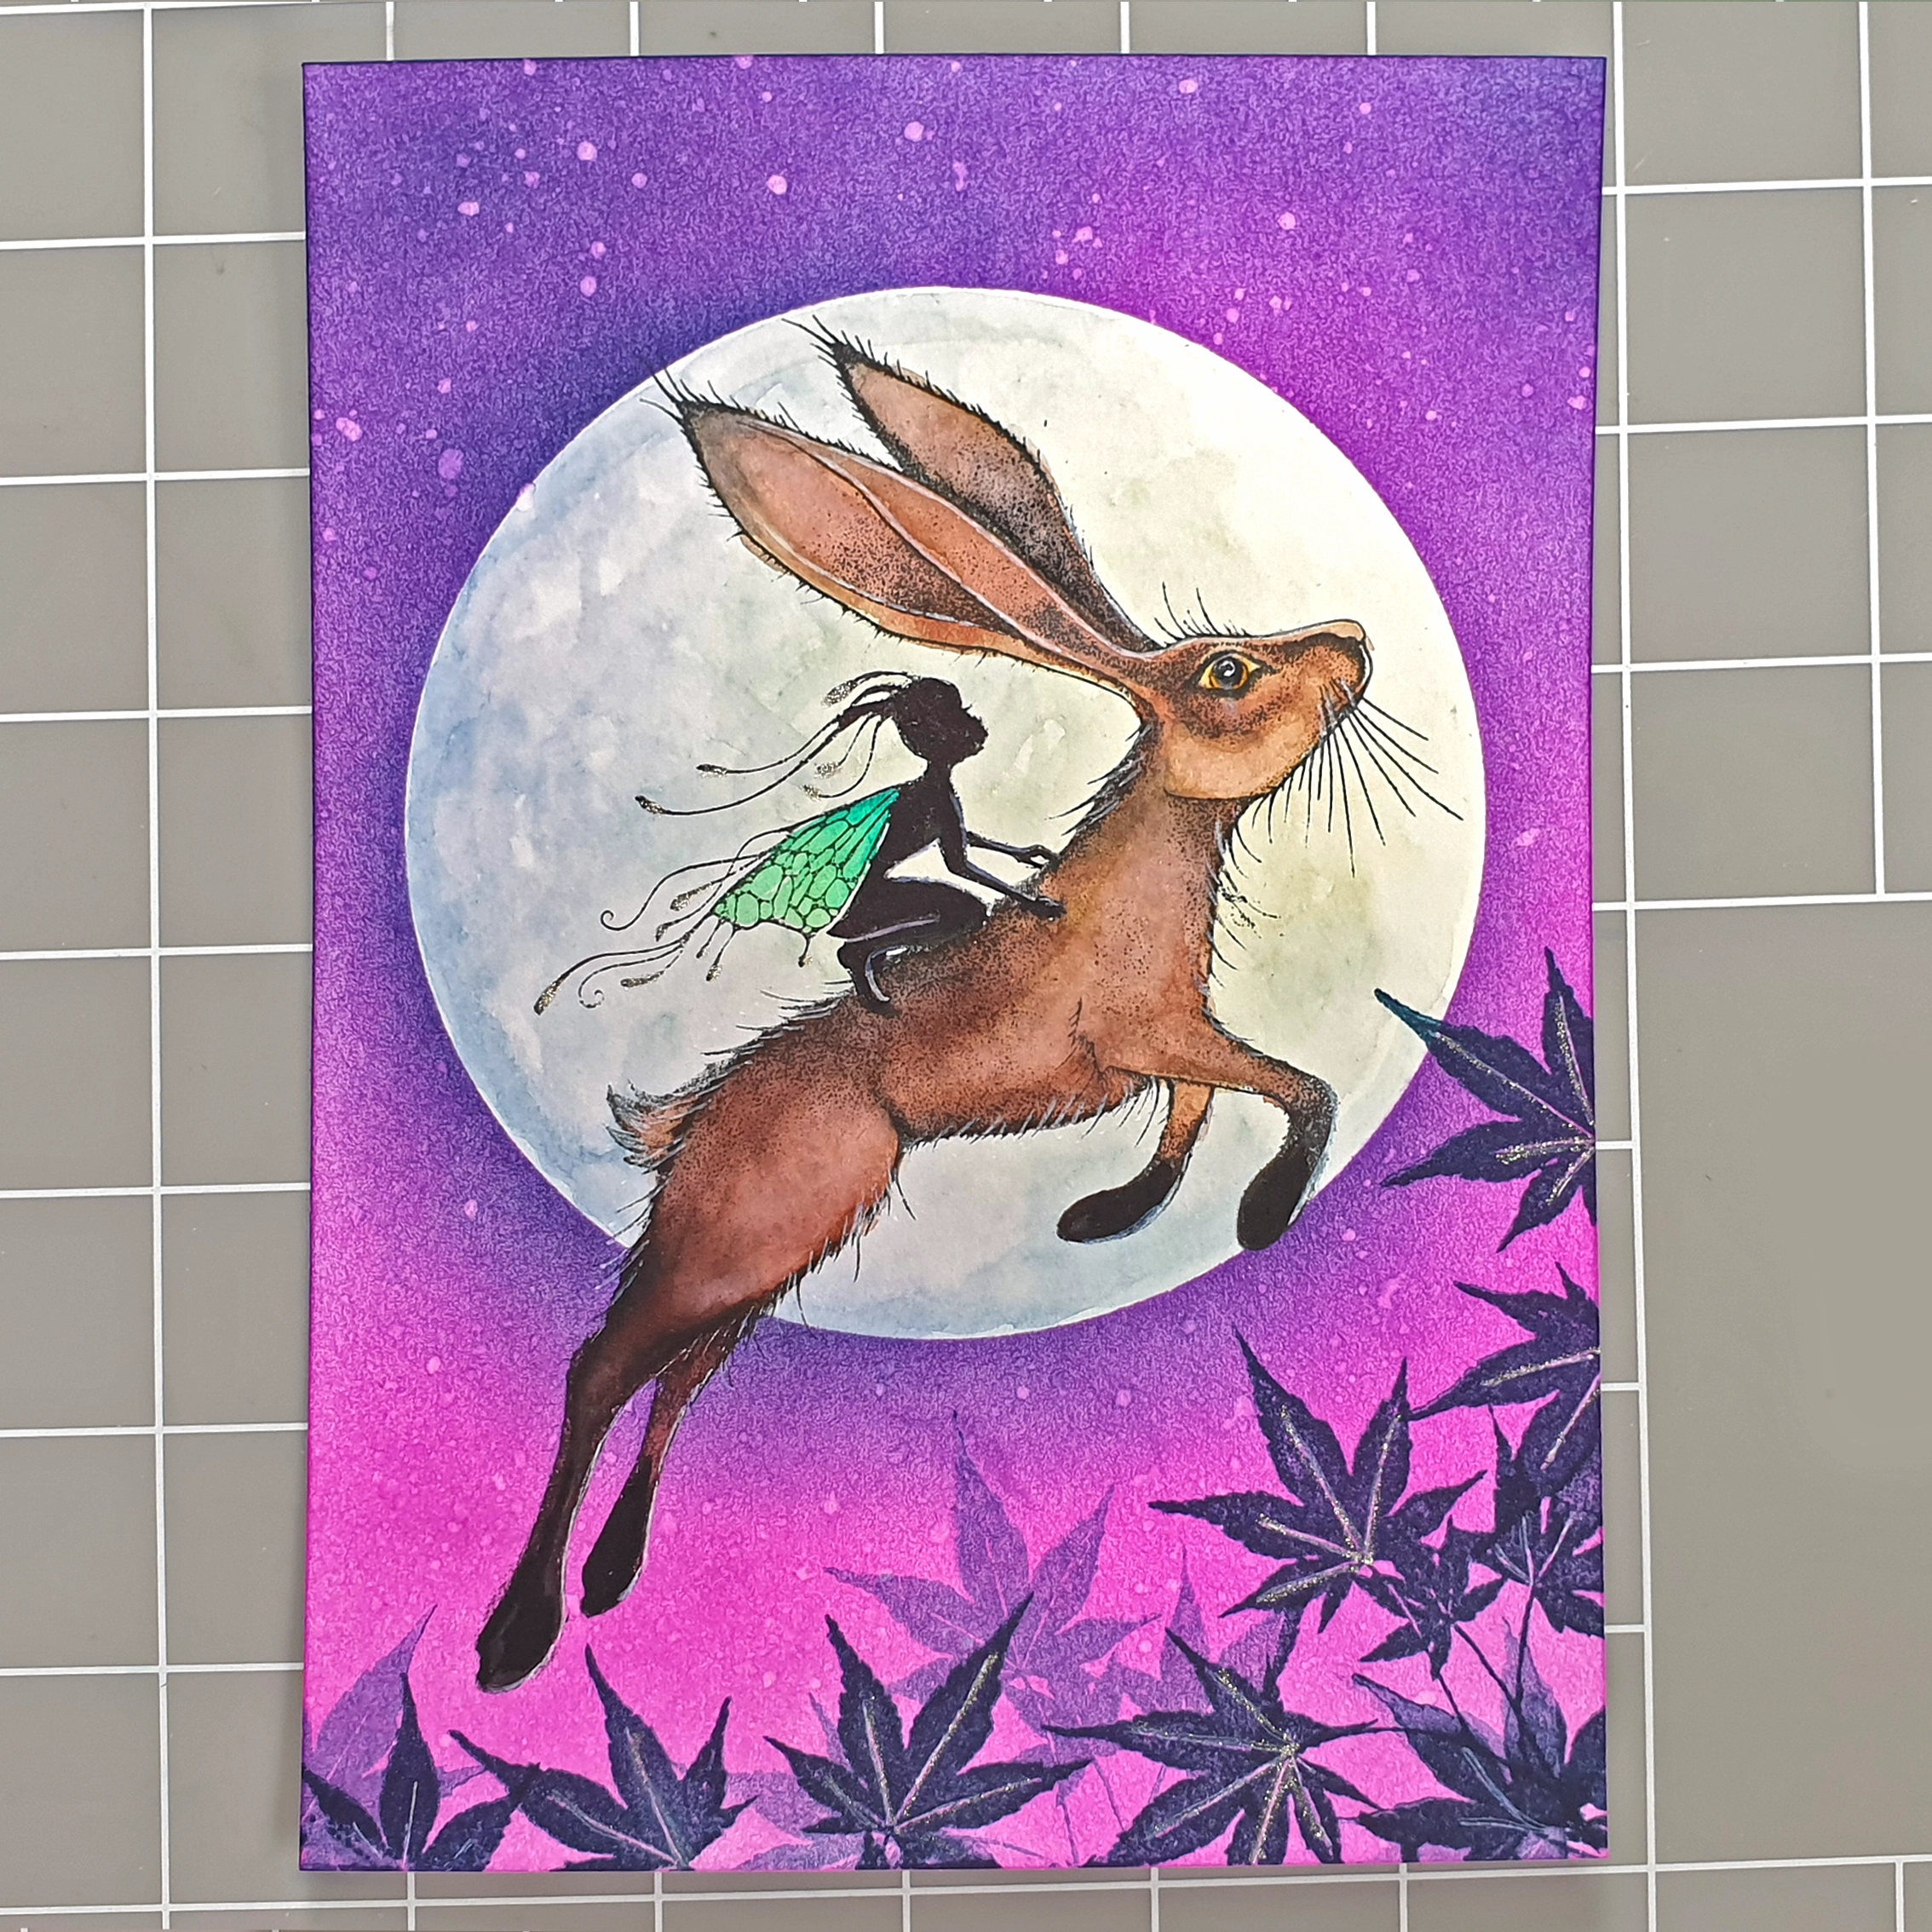
Ink up the maple leaf in Twilight and place along the bottom of the card using first and second generation stamping. Focus the bulk of the stamping on the right-hand side, as though Logan has to leap over it. Use a white gel pen to add highlights to the leaves, Logan’s eye, his tufts of fur and Nia’s arms and legs. I use the Signo angelic white pen as it is very delicate. Use a clear Stardust gel pen to add some sparkle to the leaves and the tips of the tendrils on Nia.
Step 14.
Add little dots of Stardust stickle onto the larger water splats around the card and then pop a blob onto an acrylic block and use a detail brush to add some sparkle to Nia’s wings.
I hope you enjoyed making this magical scene with me, every fairy needs a flying hare to soar over the forest with!