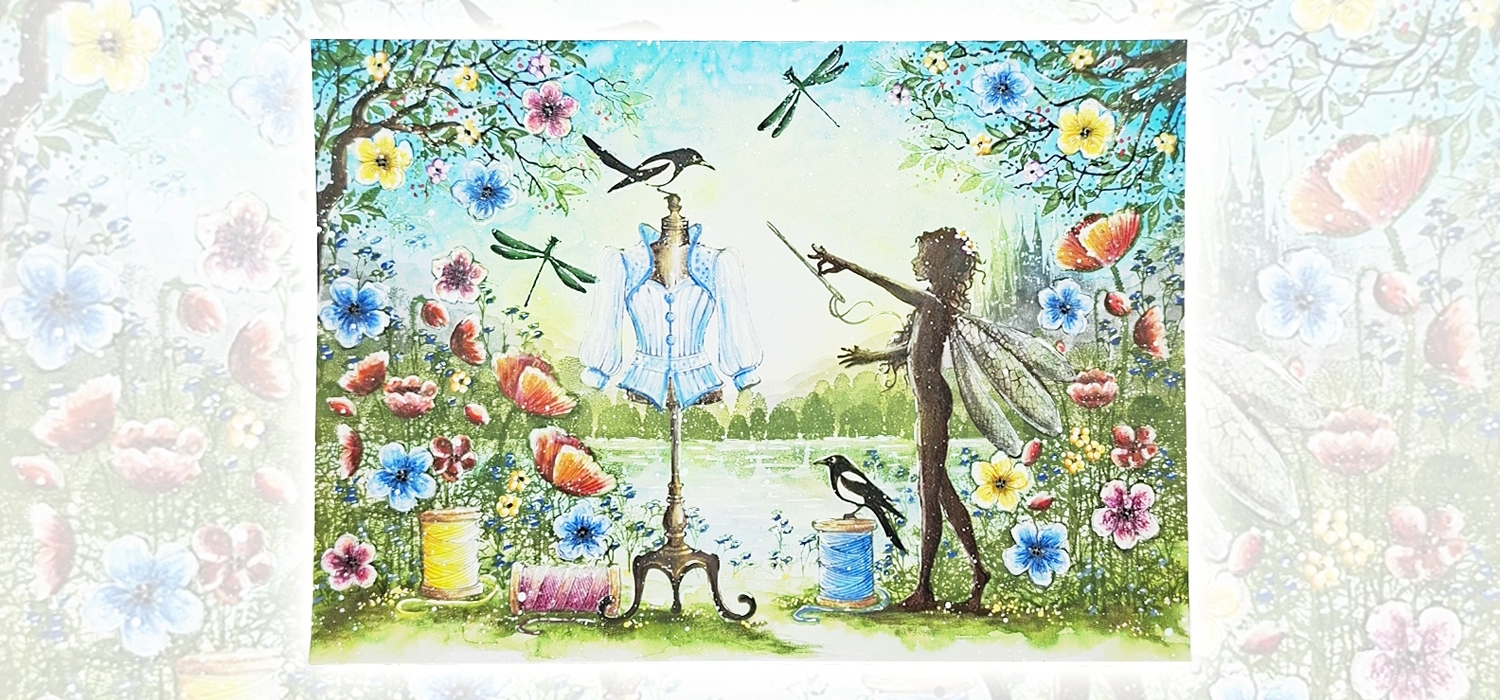
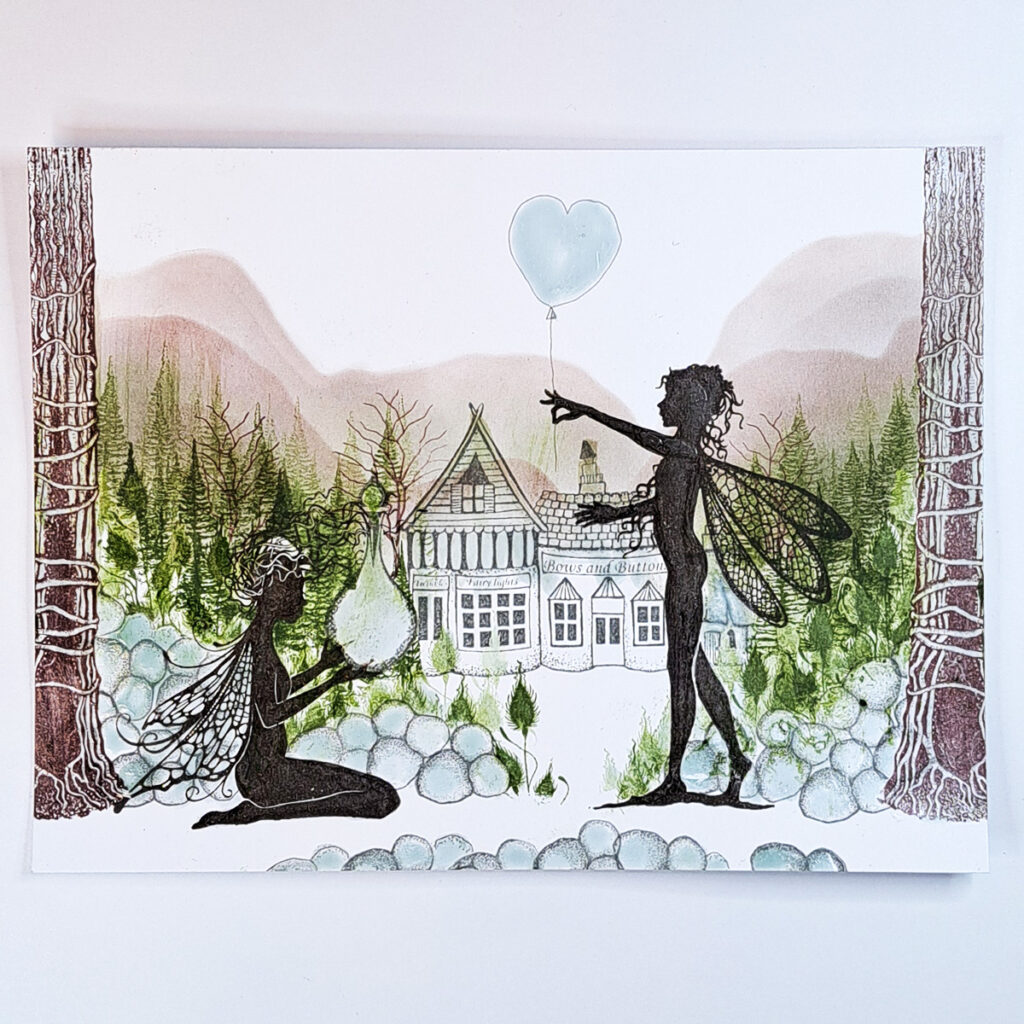
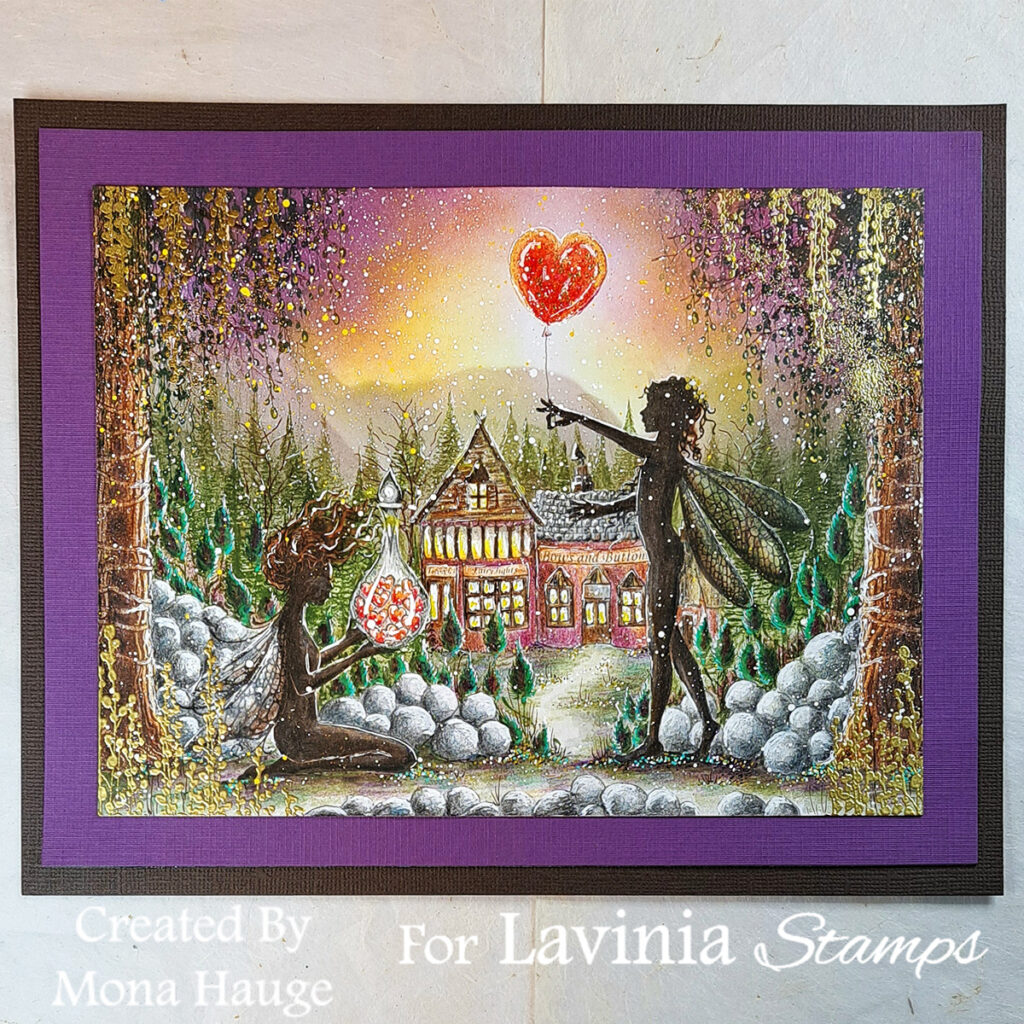
Hearts, by Mona Hauge.
Hello everyone.
Another picture tutorial from me.
This one is called “Hearts”.
Our lovely friends Freya and Aria are exchanging Valentine’s gifts .
This goes so well with the Challenge of this Month which is called “Love is All Around”
Hope you like it! 🧚♀️
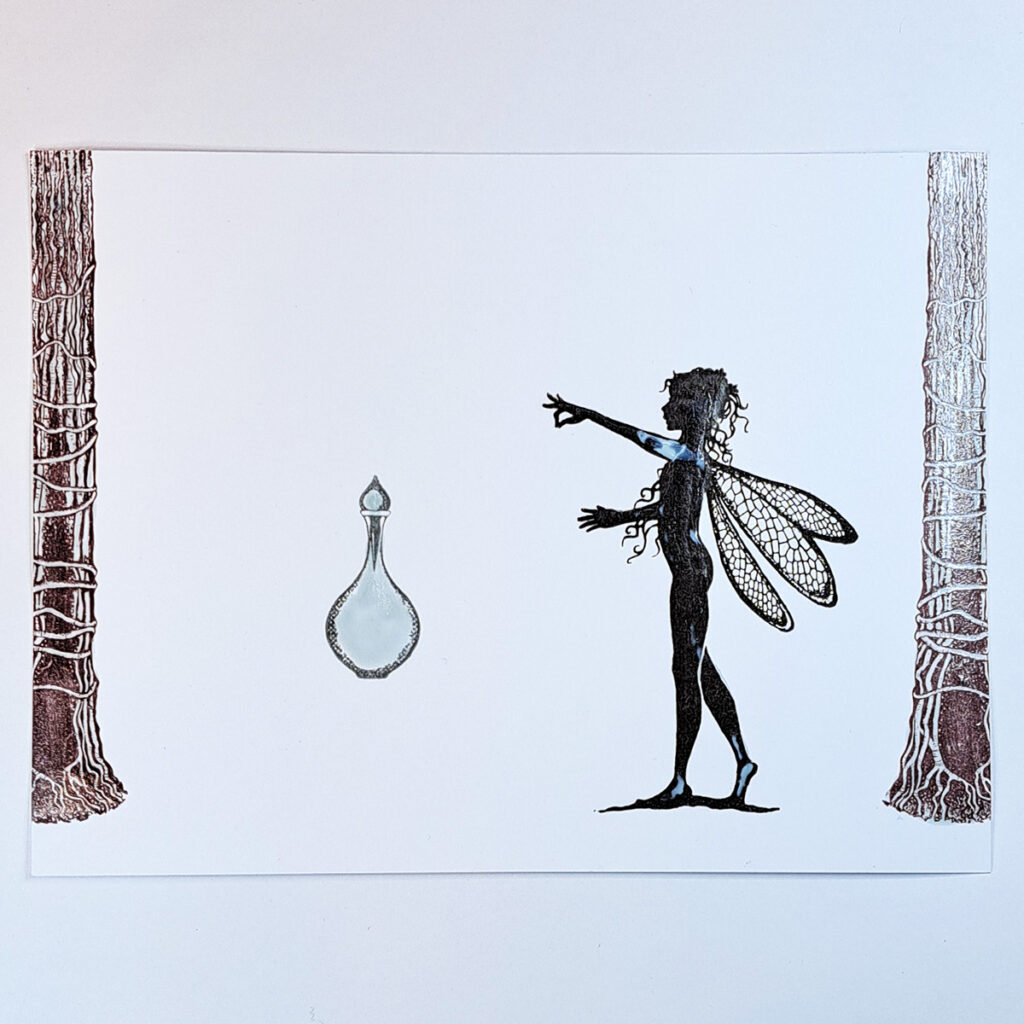
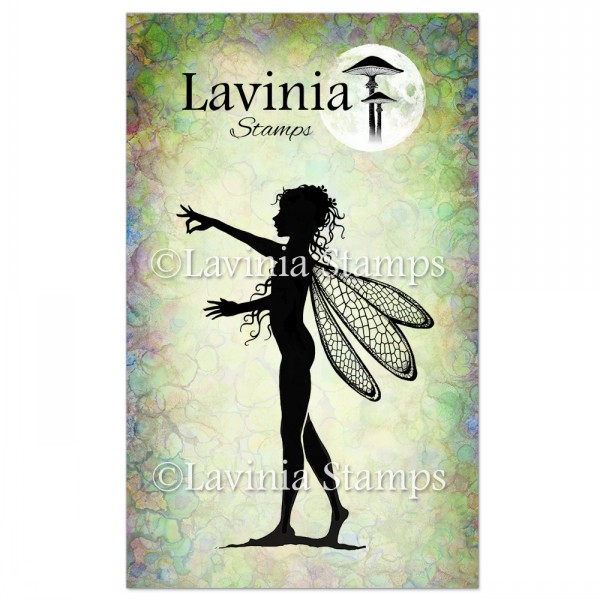
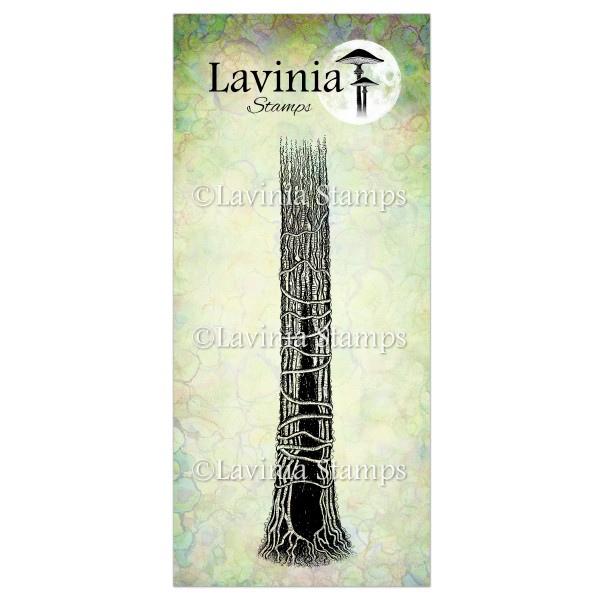
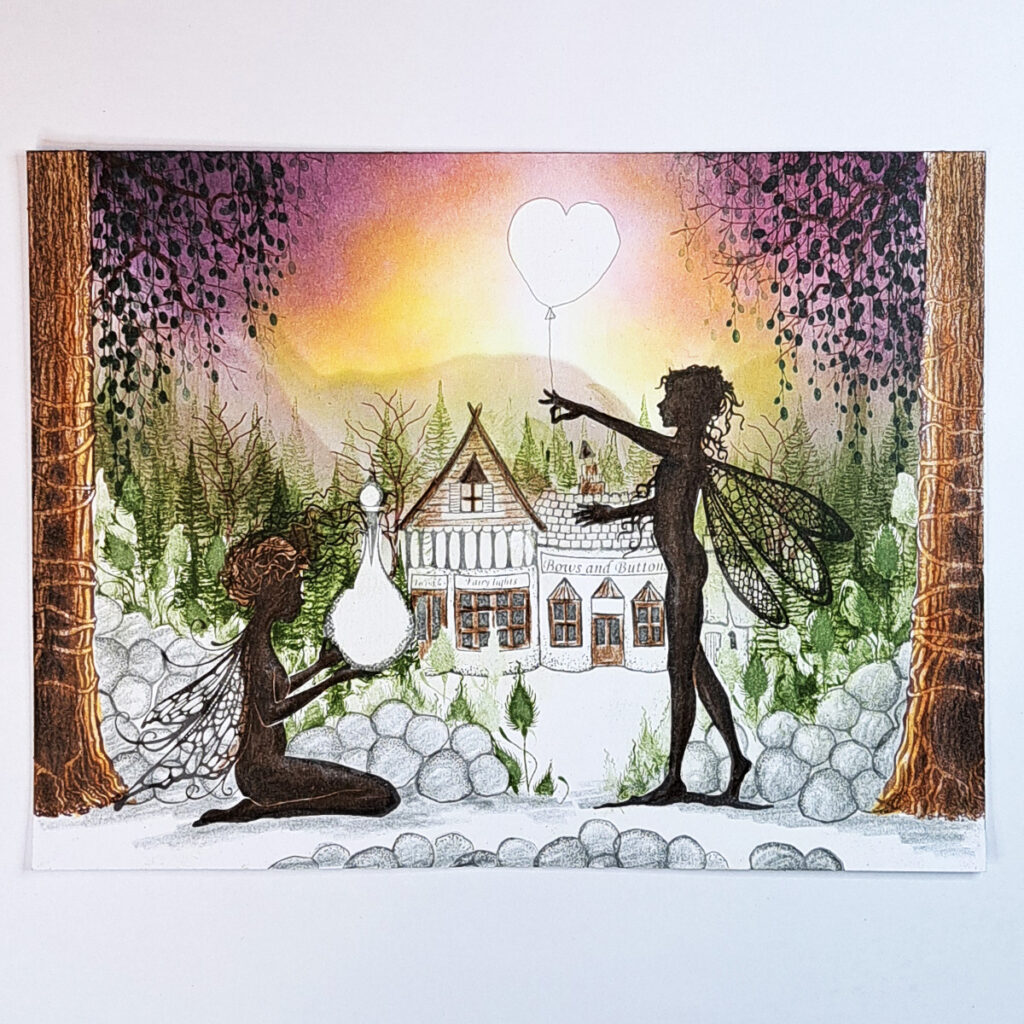
On A5 white Multifarious (landscape) let’s start with the lovely Freya LAV356. Stamp her in Versafine Clair Fallen Leaves. Then stamp the Tree Den LAV642 in Versafine Clair Pinecone.
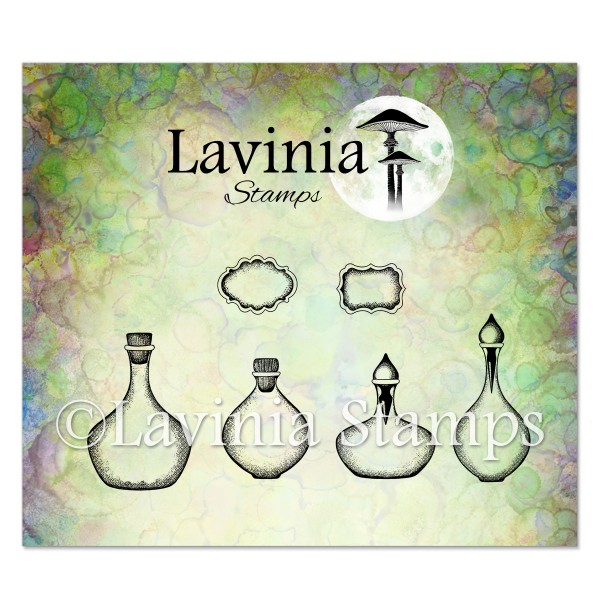
The fabulous new bottle called Spellcasting Remedies we will stamp in Versafine Clair Morning Mist.
Our friend Aria is going to be holding the bottle so make sure you place the bottle with room for Aria to sit and hold it. But first we need to put Liquid Masking fluid on everything.
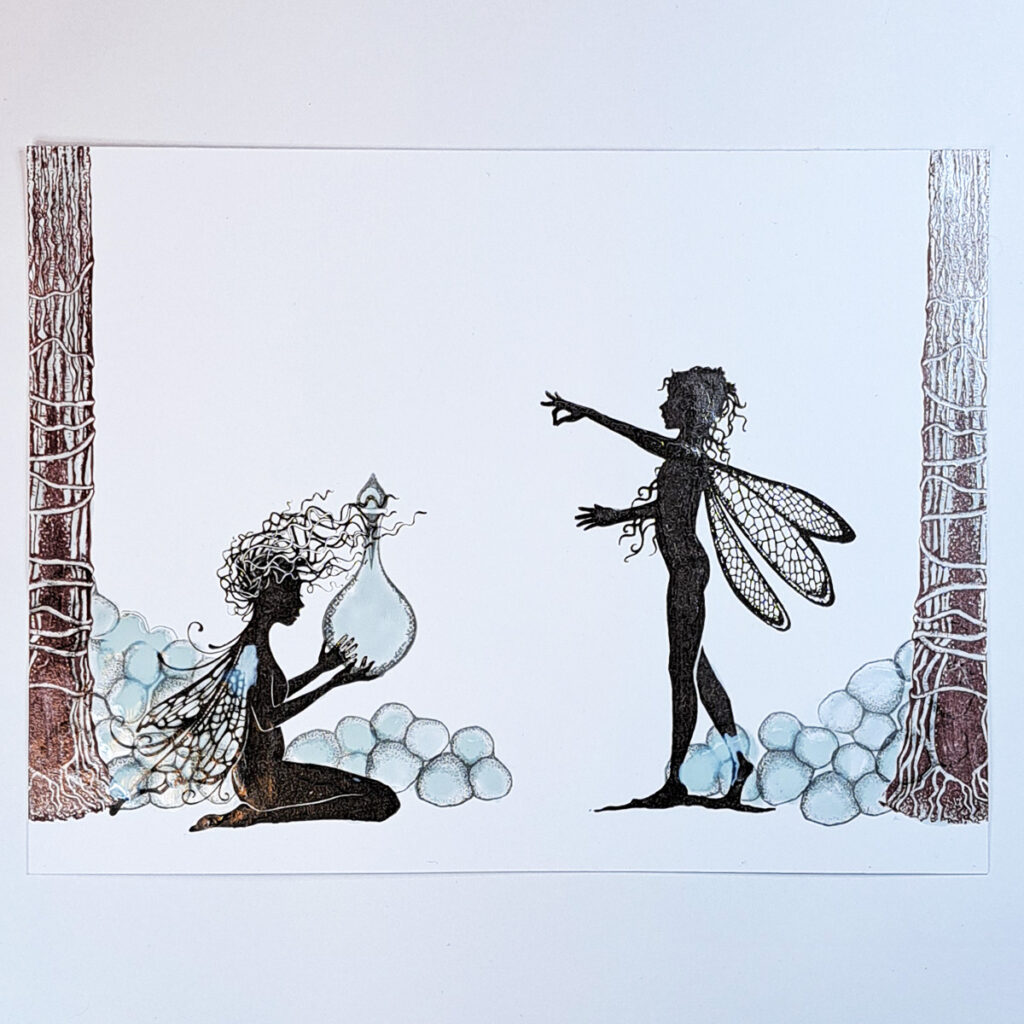
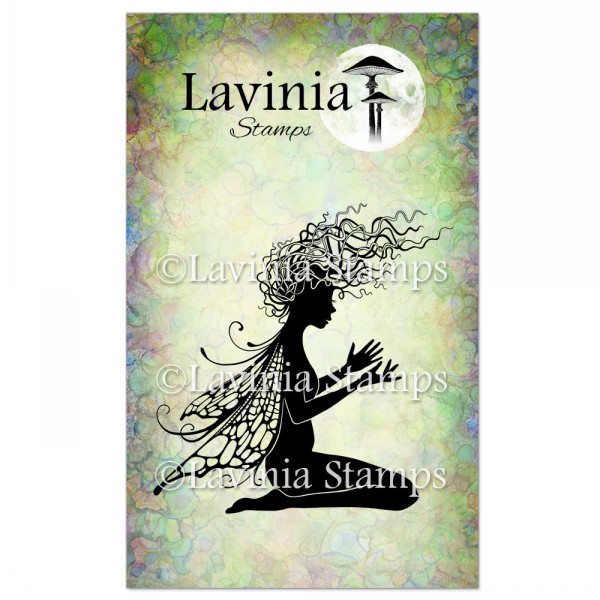
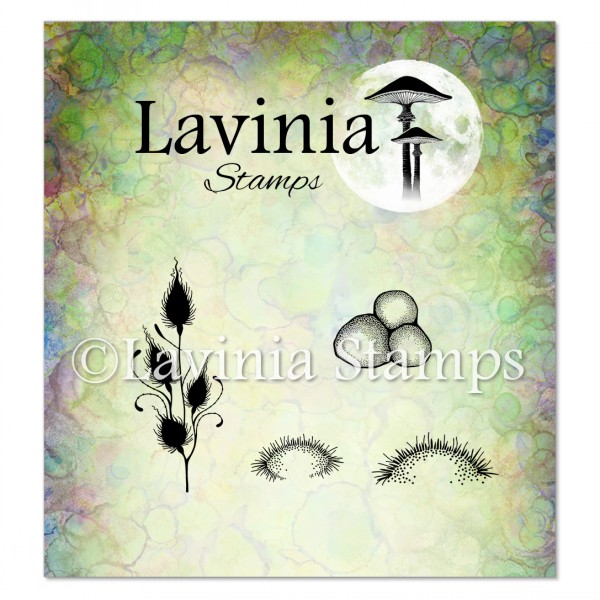
When that the liquid Masking fluid has dried, we can stamp the lovely Aria LAV584 in Versafine Clair Fallen Leaves and then put Liquid Masking fluid on her. We want some stones, and you can find some super cute stones in the Forest Moss Stamp set. We stamp them in Versafine Clair Morning Mist. Look at the picture for placement. Now cover them with Liquid Masking fluid.
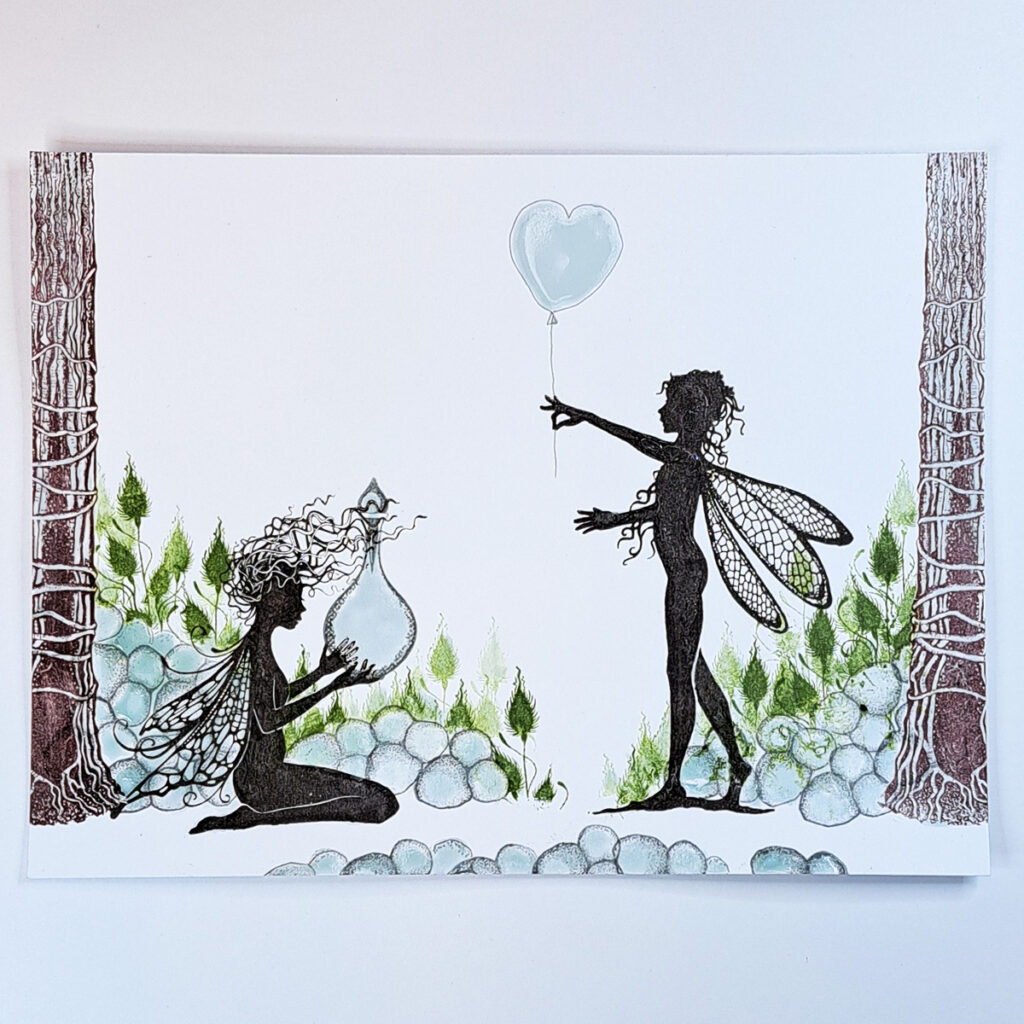
With a thin waterproof pen we draw a heart shaped Balloon in Freya’s hand. I use a grey Micron pen. Cover this with Liquid Masking fluid. Now we need some flowers, and the Forest Moss Stamp set has a great new flower. Stamp in Versafine Clair Shady Lane. Do both first, second and third generation stamping like you see in the picture. And …cover with Liquid Masking fluid.
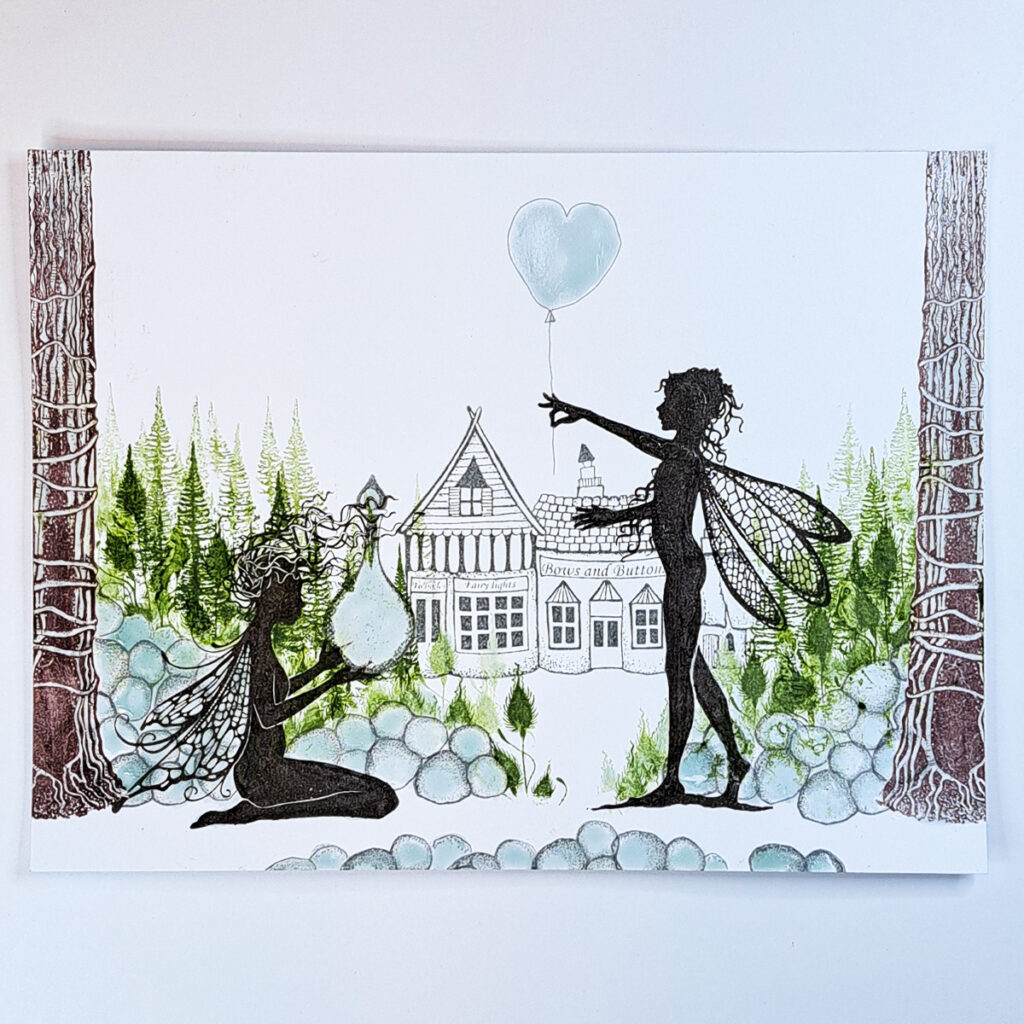
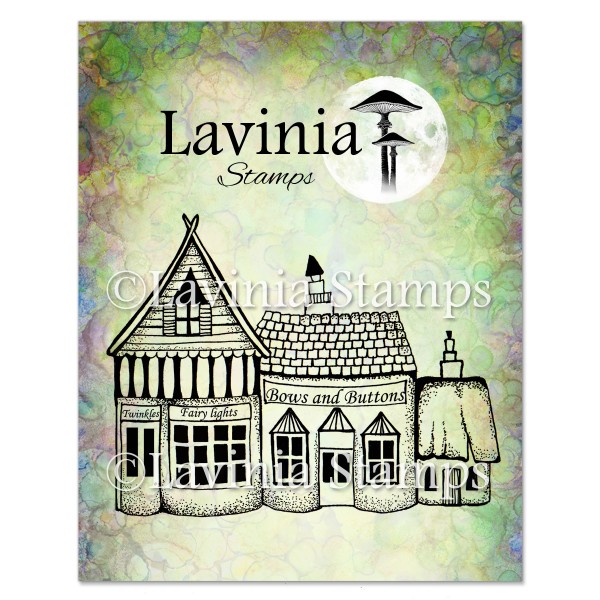
Let’s do a second generation stamp of the Fairy Shops 2 LAV144 in Versafine Clair Morning Mist .
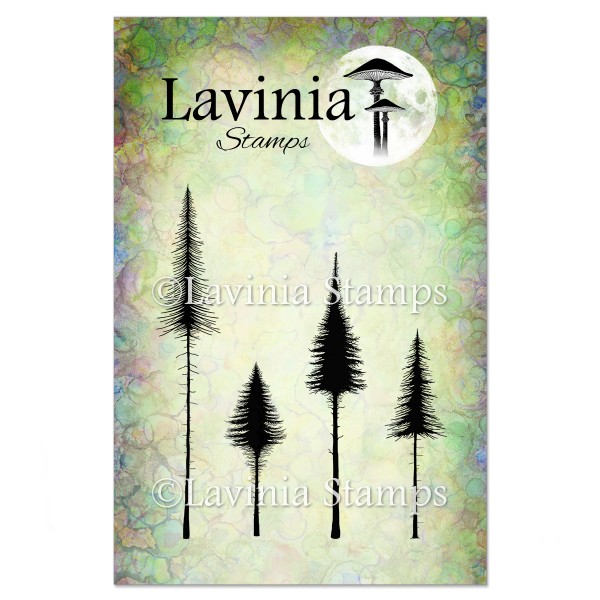
We need some trees around the shop and the Small Pine Trees LAV836 are perfect. Stamp both second- and third-time generation stamping with Versafine Clair Shady Lane.
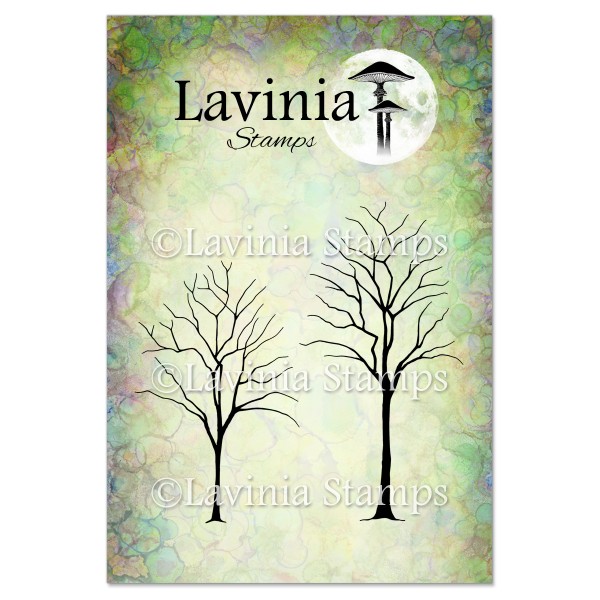
With so many green trees it will be good to have some Small Trees with branches, for this we use the stamp LAV663 and stamp it in Versafine Clair Pinecone second generation stamping.
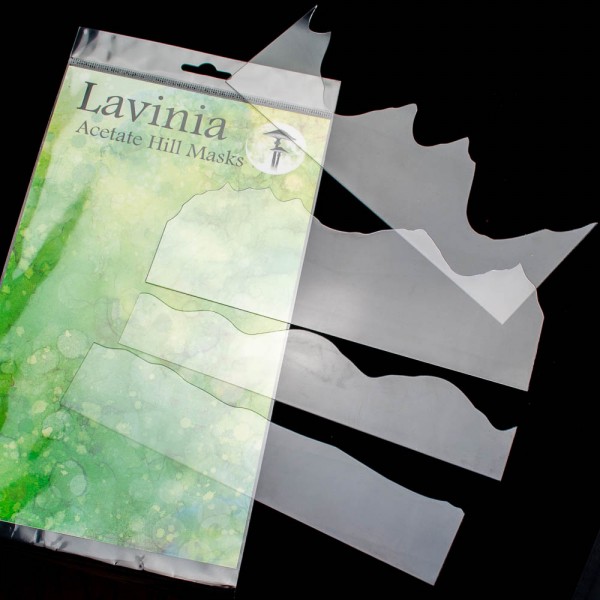
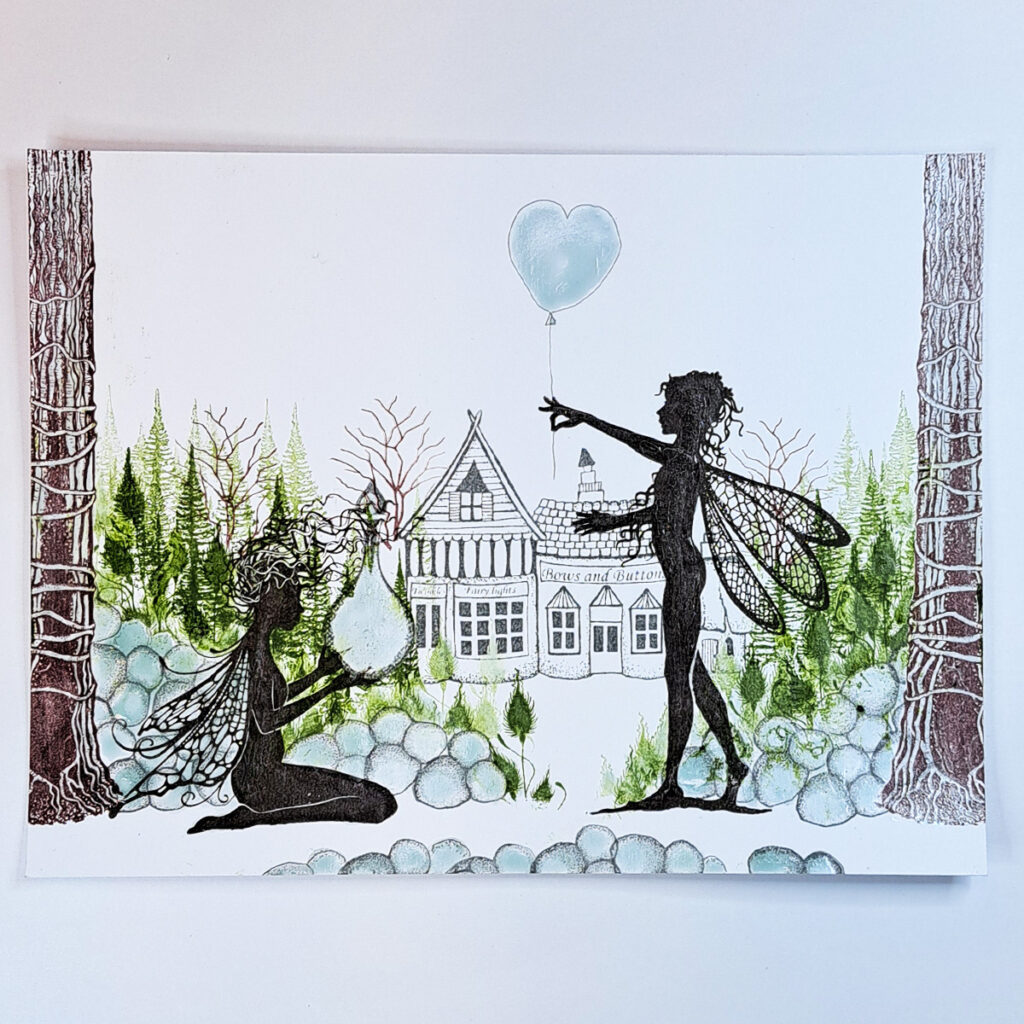
Some hills in the background will help to create some depth in our picture. The Hills Masks are so easy to use, and we want to blend some Elements Truffle and Elements Olive very, very, very softly.
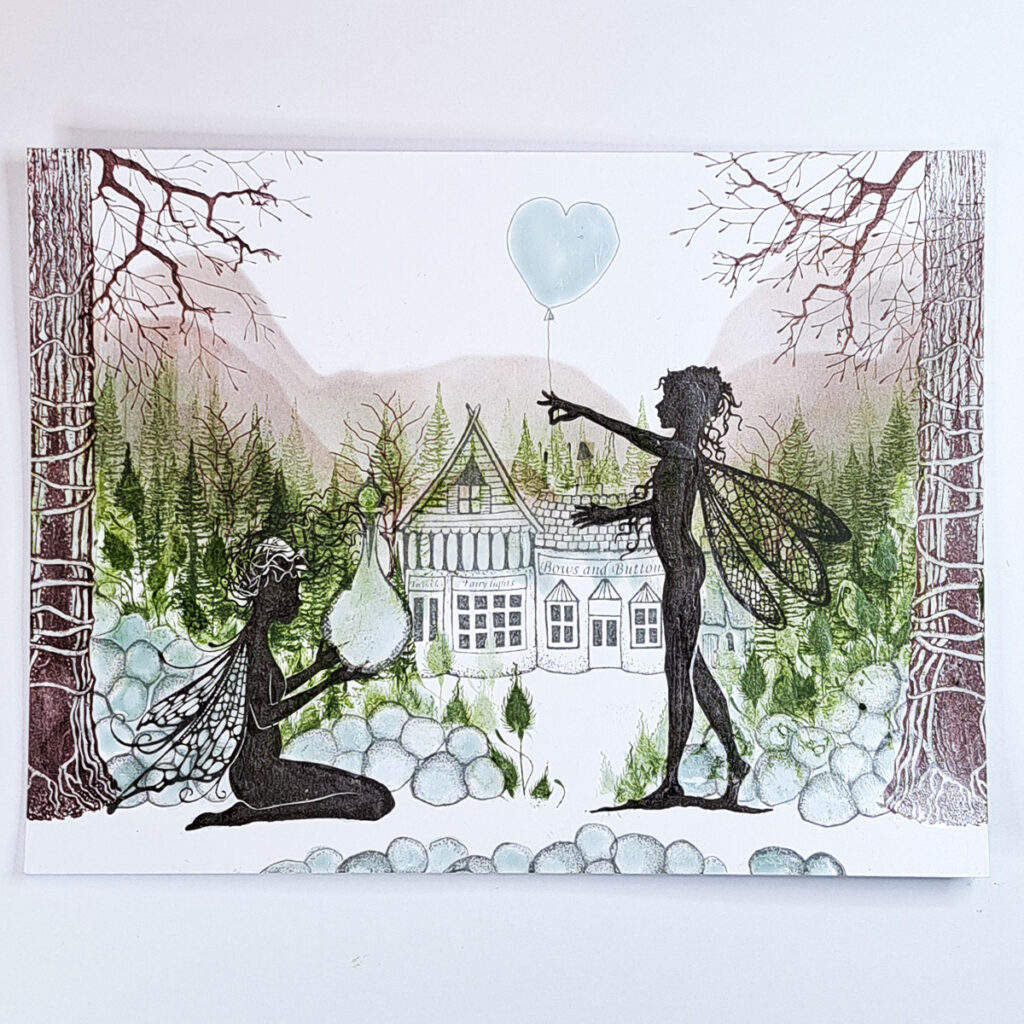
Our trees at the front need some branches. So we stamp with Versafine Clair Pinecone the Tree Branch LAV506 and the Small Branch stamp LAV703.
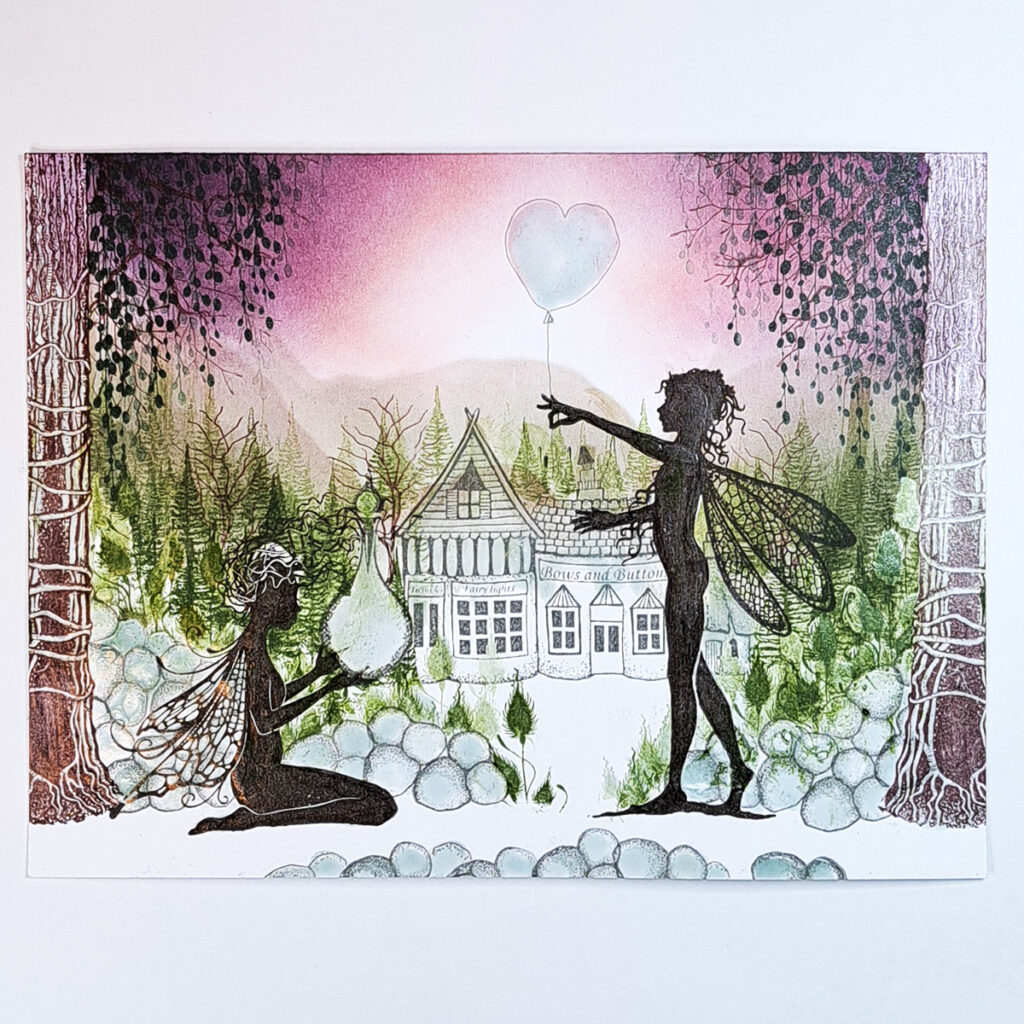
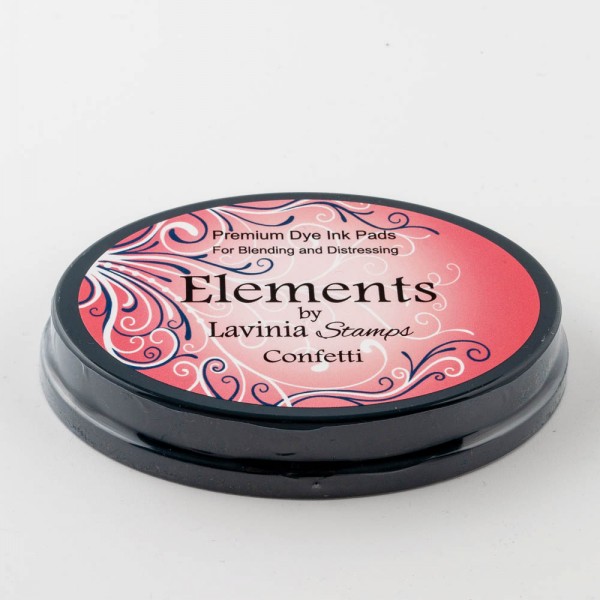
The Leaf Creeper LAV742 are fabulous to create leaves on the trees. Stamp with Versafine Clair Rain Forest. The sky has 5 colours on it and we start with Elements Violet chalk, then we use Elements Mulberry and just a hint of Elements Confetti.
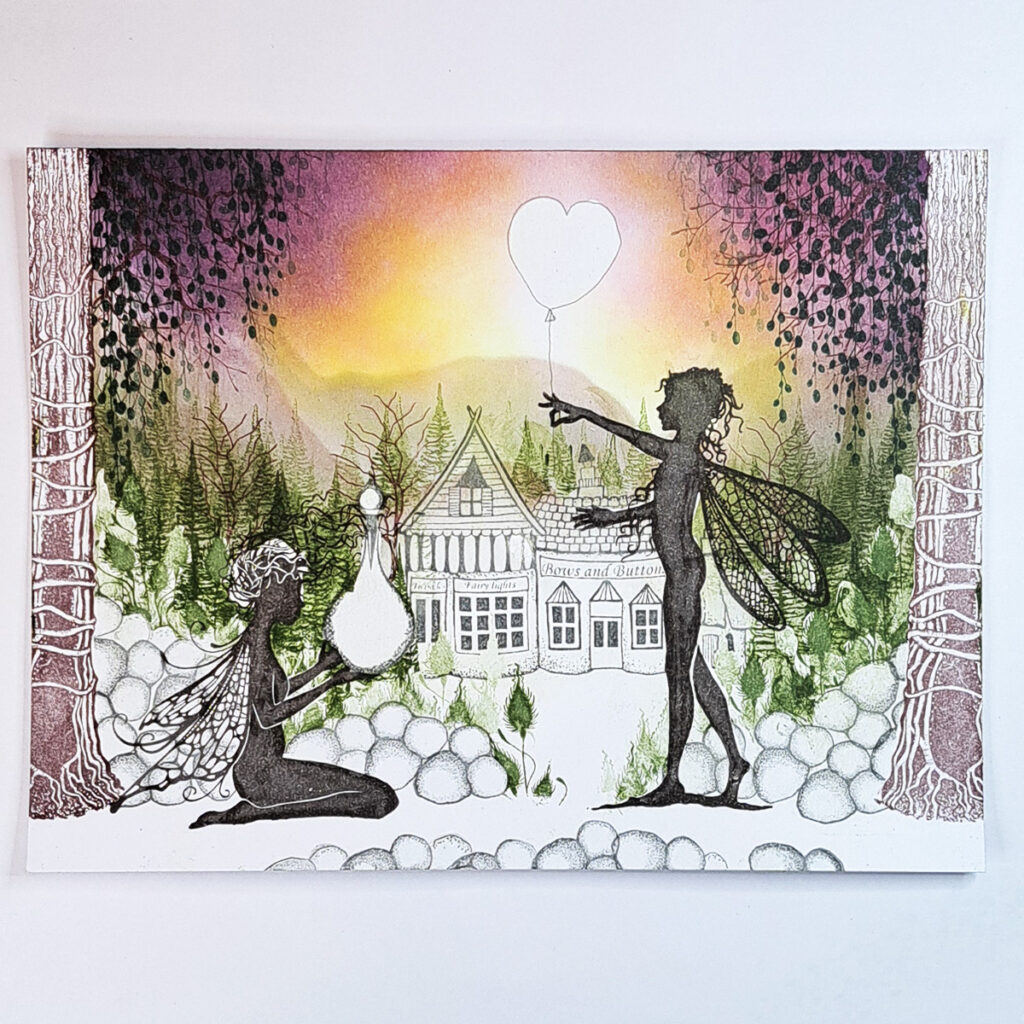
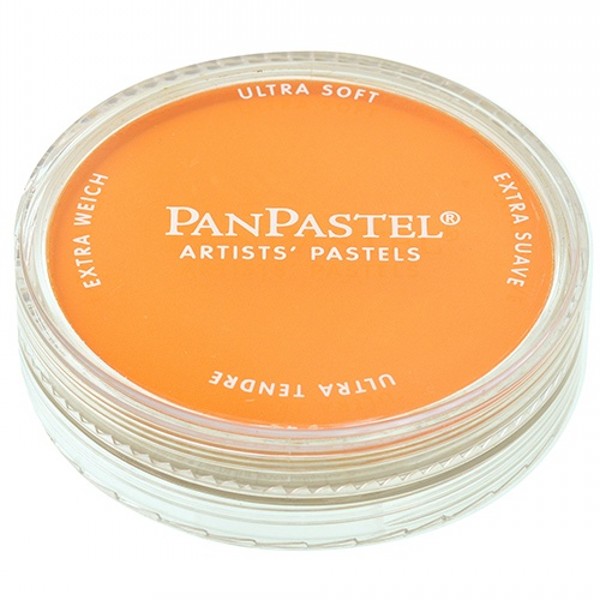
Before we add the rest of colour on the sky, we can remove the Liquid Masking. Just make sure that your card is 100% dry. Even a little moisture can make the paper rip when you rub of the Masking. Now we will add some Pan Pastel Hansa Yellow and some Pan Pastel Orange to create a glow to our sky.
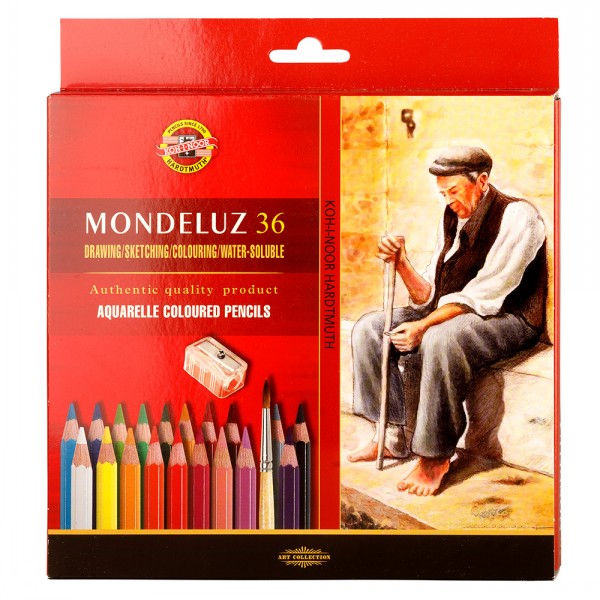
Now we can start to colour the different elements on our card. I use my Mondeluz watercolour pencils because they are so soft to draw with and bright in colour. We will use many colours on our trees because it gives us so much life and depth. Dark brown, brown, reddish brown and ochre are a good blend of colours. On the beautiful fairies we will use dark brown, brown and beige.
The Fairy Shops need some wood doors and windowsills and on the wooden parts. We also colour a light grey colour on all the stones.
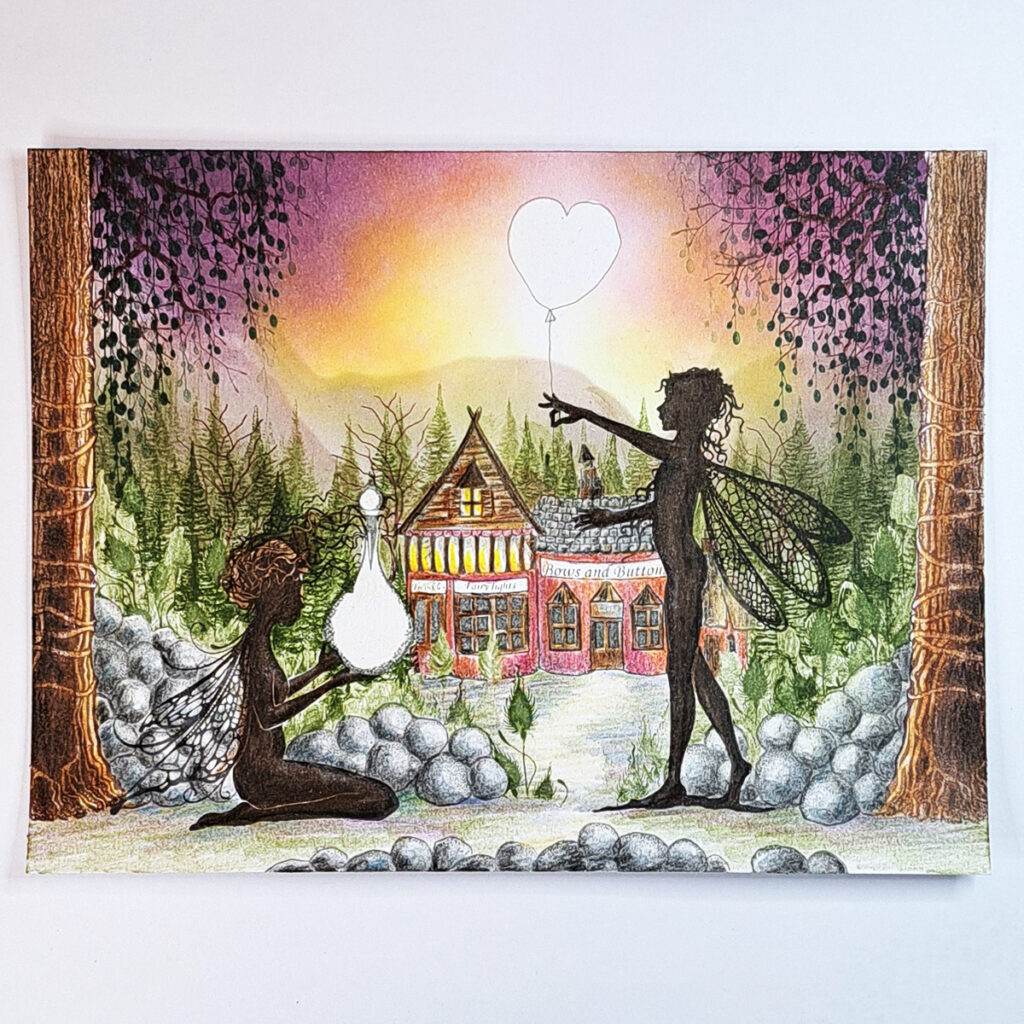
Our Fairy Shops will have a rose colour blended with beige and a hint of purple.
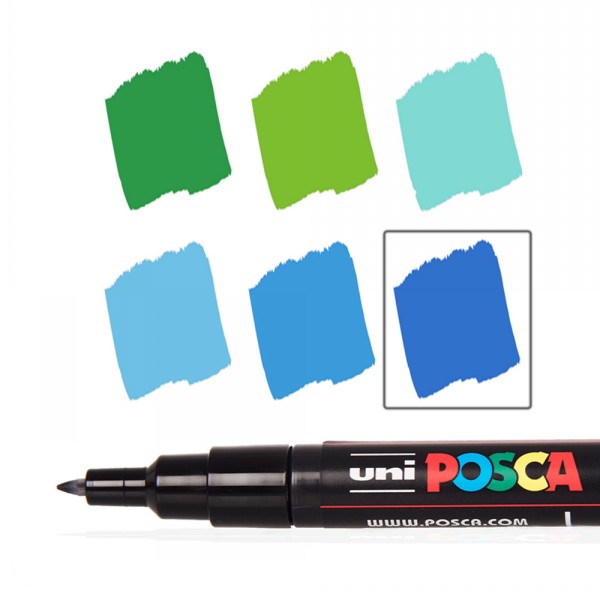
The roof of the shop we colour medium grey and we put some white Posca pen in all the windows and a hint of yellow Posca pen in each of the Windows too.
Now we use a darker grey to shade the stones. If you are not sure where to place the colour look closely at the picture. A little bit of black colour just in the darkest sports on the stones will help to create some depth. On the ground we will also use many colours, green, grey, purple, and ochre will give us a ground with more depth.

The Thistle flowers we will colour with an aqua green Posca pen like you see in the picture. Add a little purple colour pencil in the middle of the flowers.
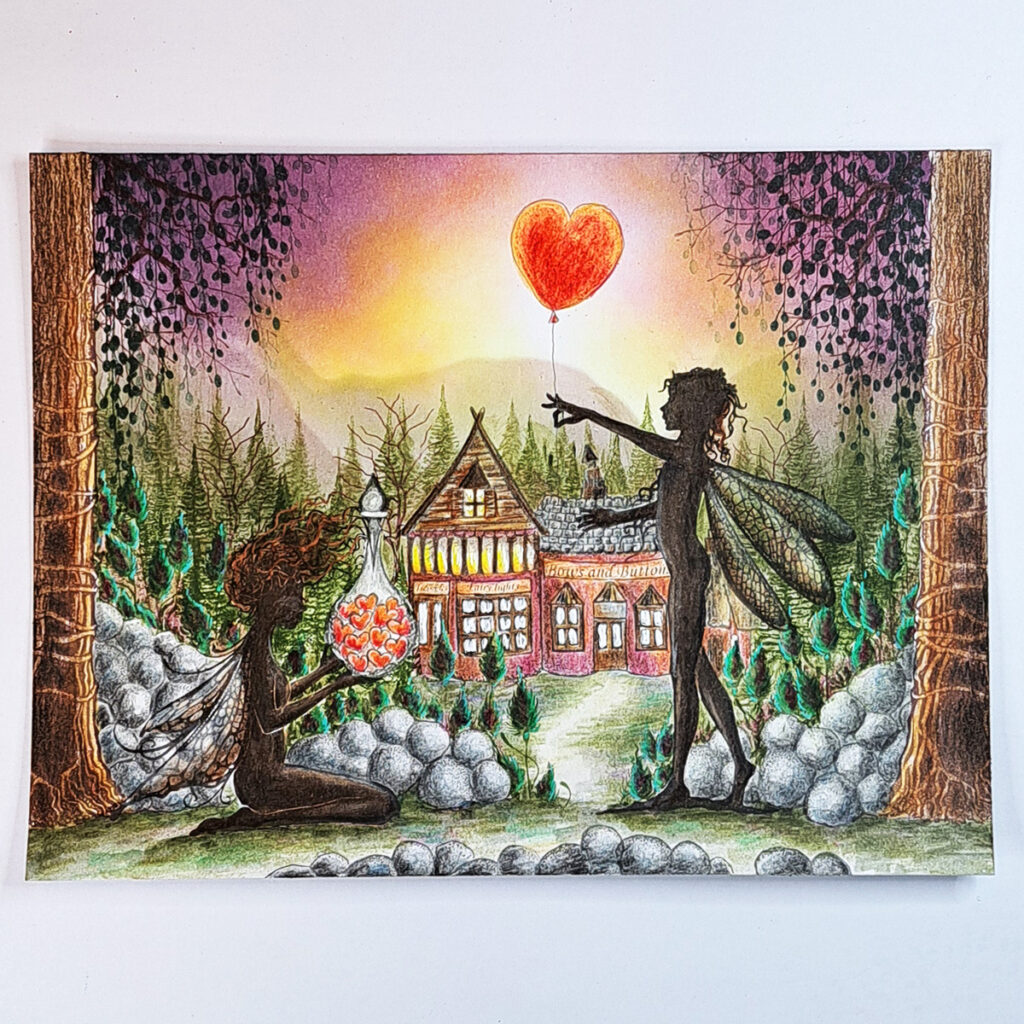
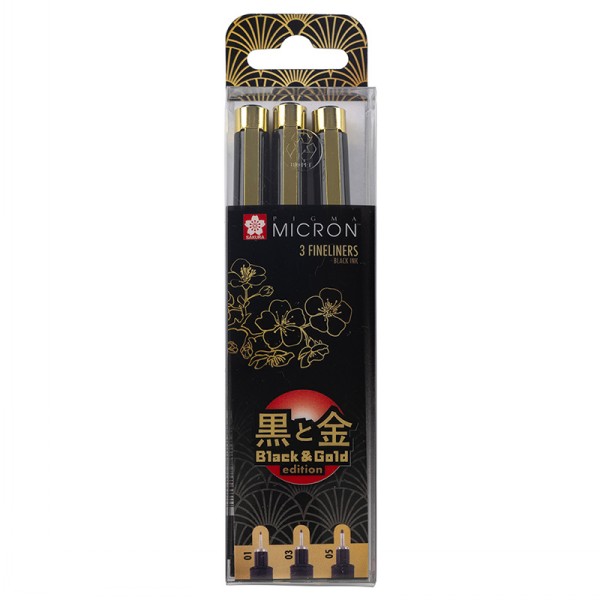
Now it is time to colour the heart Balloon. Use a few different red colours and an orange. To draw the hearts in the bottle we use a Micron pen 005 grey colour. Then colour them with the same colours we used on the balloon. The bottle needs a little light grey pencil colour.
A little bit more colour on the ground and some dots with the Aqua green Posca pen will give it more life.
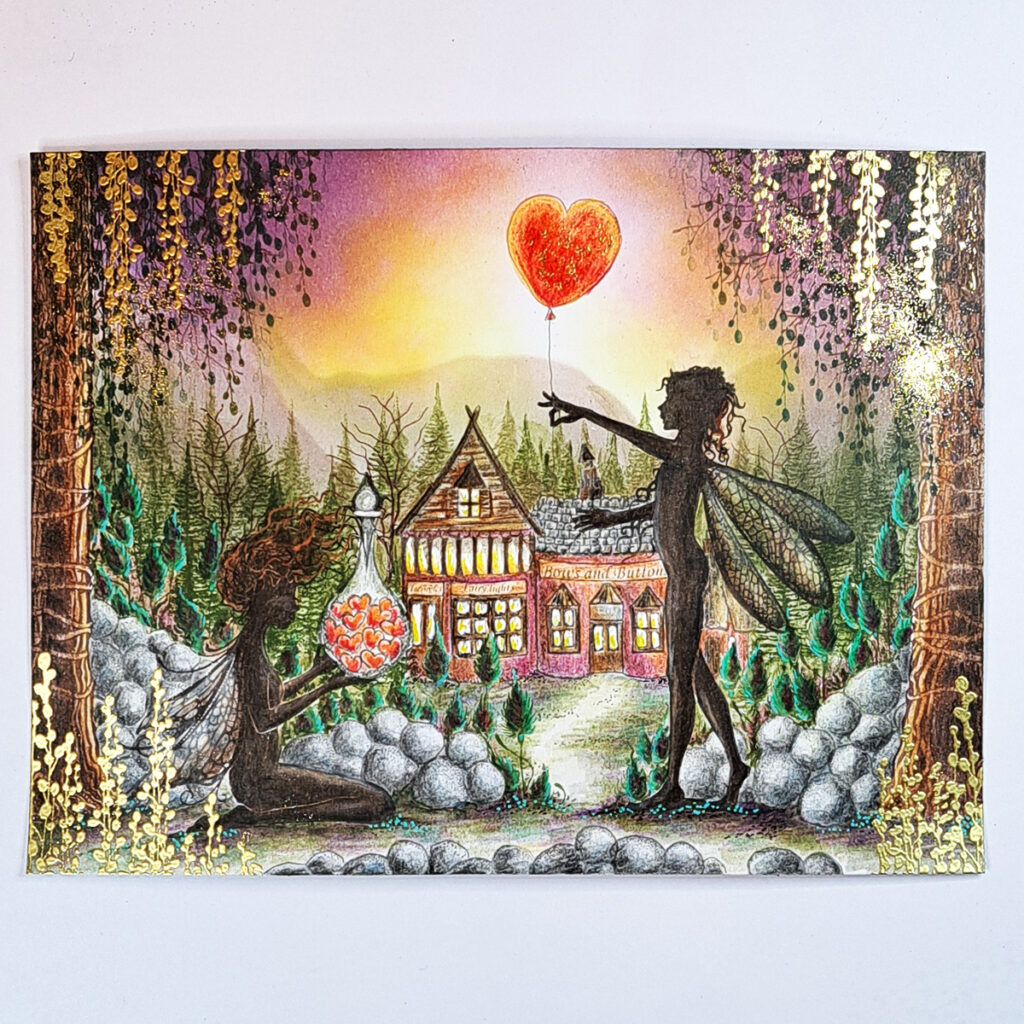
To give our picture a little extra we will stamp some more Leaf Creeper LAV742 and use some gold embossing powder.
And now we are ready to do highlights on everything. Also we draw some reflections on the bottle and the balloon. Look at the picture for placement of highlights. I use a white Uniball pen but a white Posca pen is great too. Let’s also draw some more dots on the ground and with our grey Micron pen grey we can draw some tiny straws on the ground.

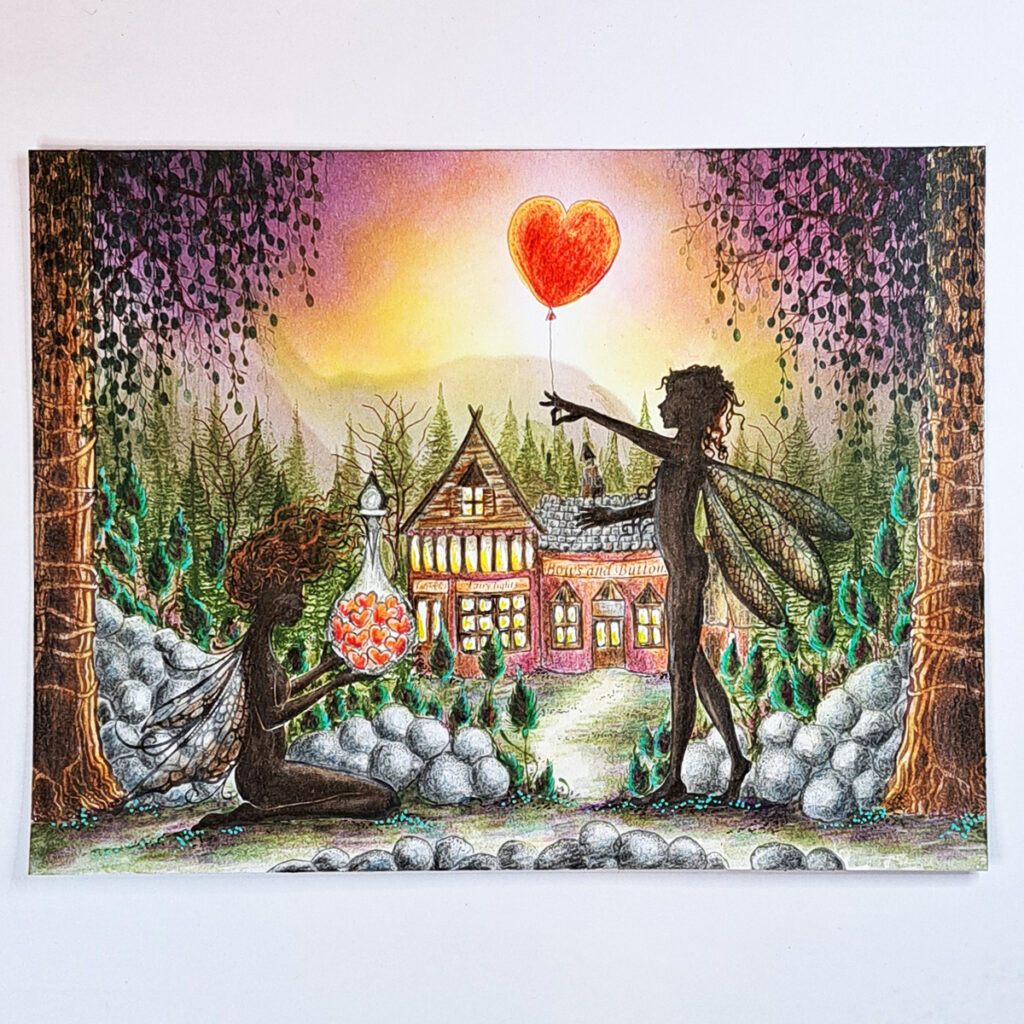
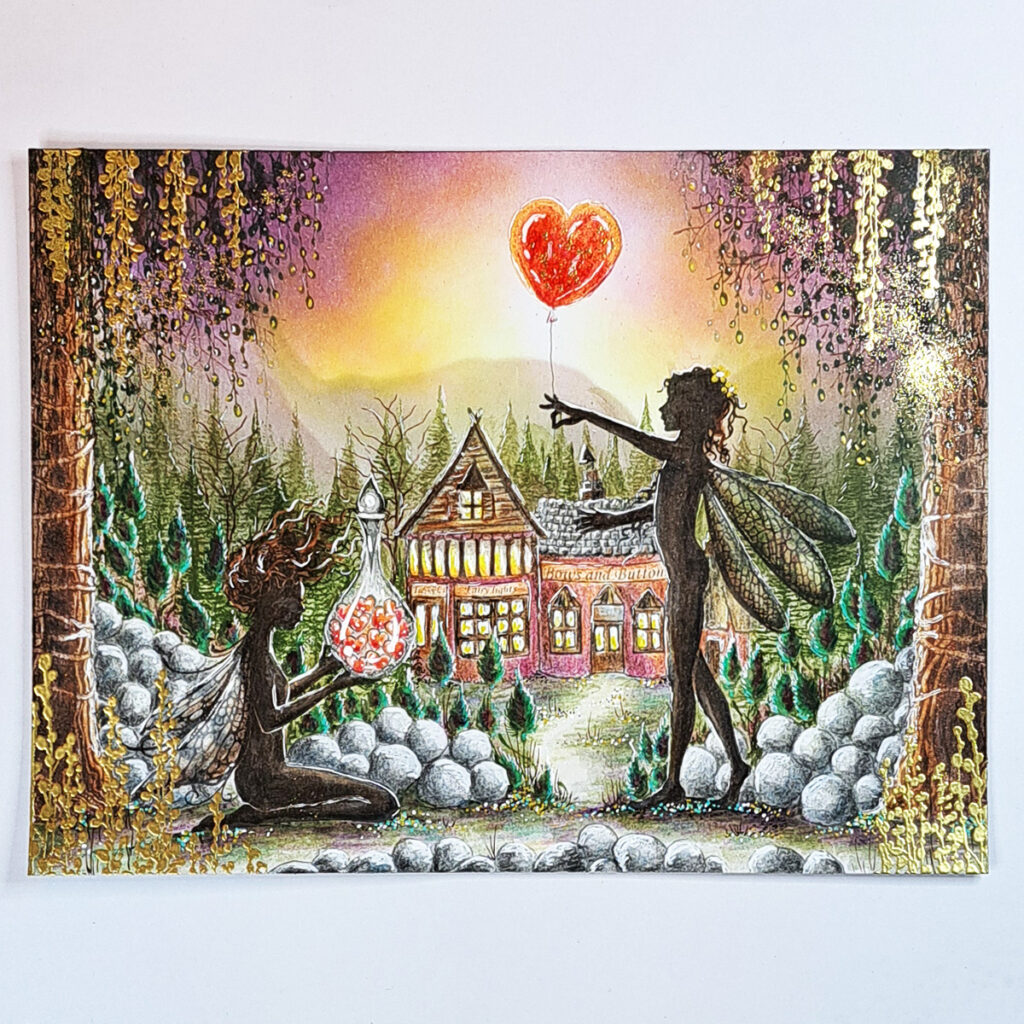
For the finishing touch let’s do some Posca pen splatters. Do both white and Yellow.
I really hope you enjoyed following this picture tutorial. If you have any questions just ask me and I will answer as soon as I can.
Big hugs from Mona 🧚♀️